How to track your New Year's resolutions with Timelines
Happy New Year! If you are like me, you find the beginning of the year exciting. It's a fresh start. An opportunity to do things differently. That's why many of us set up New Year's resolutions. But the problem is that it's easy for life to get in the way, and to eventually fail on our promises and get back to the same old routine. Leaving us feeling defeated yet another year.
But there is some hope! While I can't say I have the magic bullet, I do believe that by tracking your progress with your New Year's resolutions, you can significantly increase the likelihood that you will stick with them.
In this short article, I'm going to show you step-by-step how easy it is to track your resolutions with Timelines. The first part will show you what you can accomplish with the free version of Timelines, while the second part will explore some of the benefits of getting the PRO version.
Getting started
- First, download Timelines for free on the App Store here.
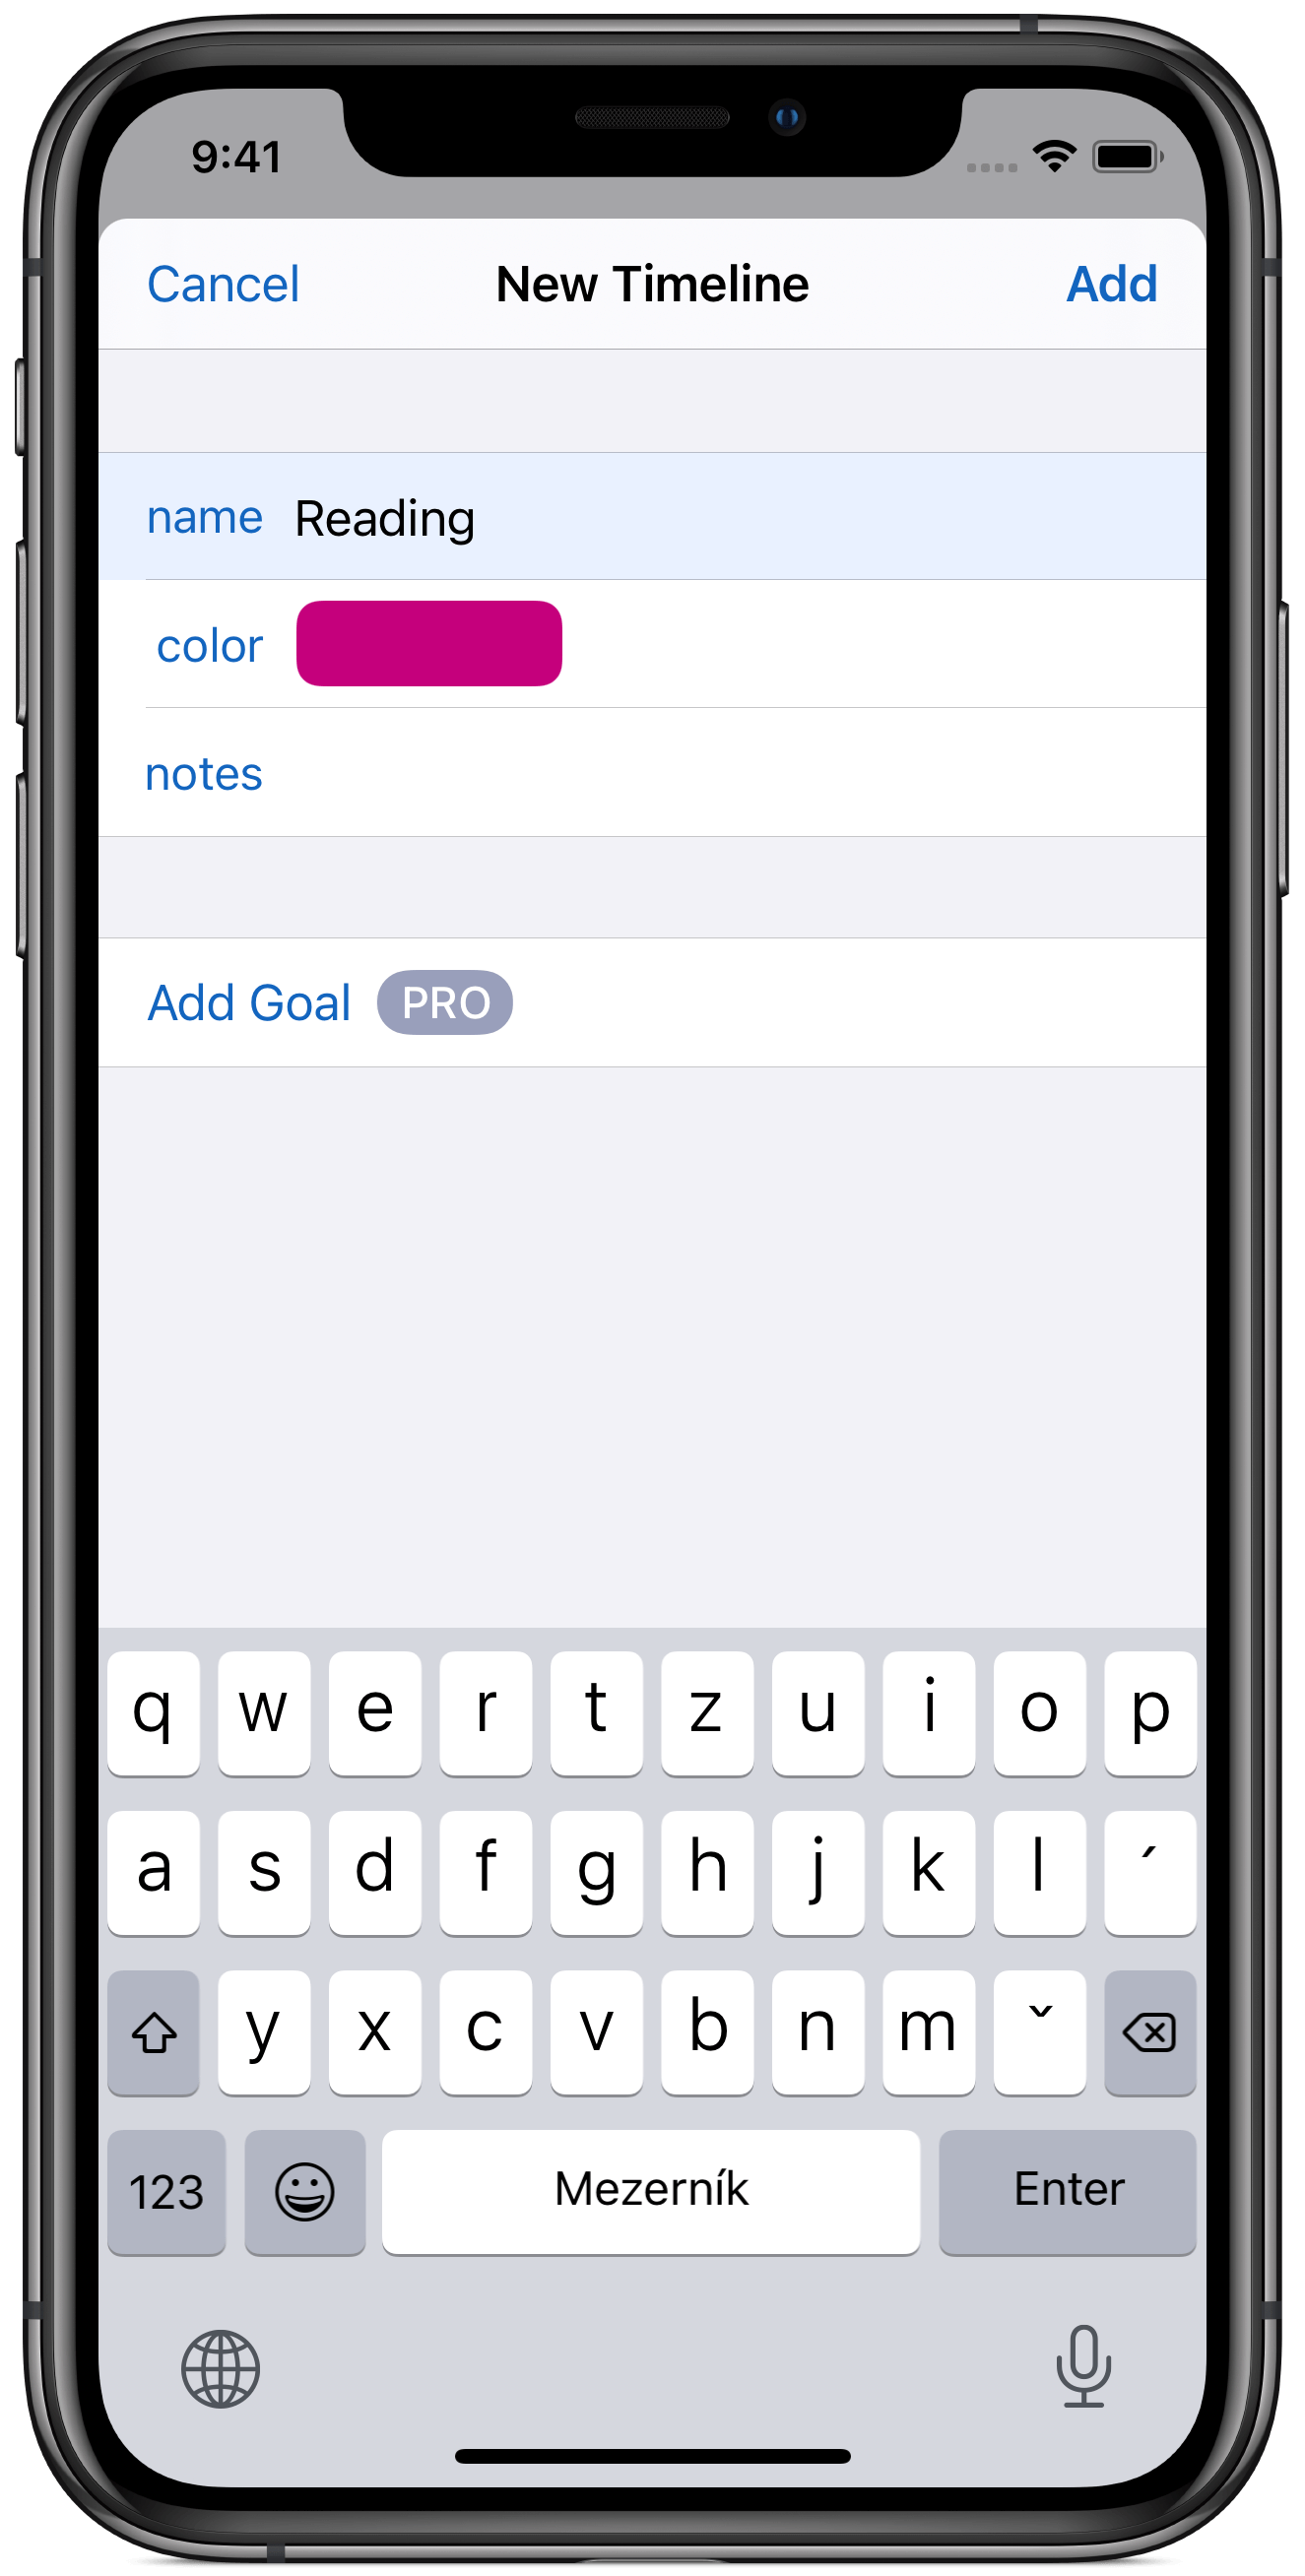
- After you get through the initial onboarding, select the Tracking tab and create a category for each of your resolutions. In this example, we will use Reading, Exercise, and Meditation.
- Whenever you start doing an activity that belongs to your resolutions, start the corresponding timer. Once you stop that activity, stop the timer.
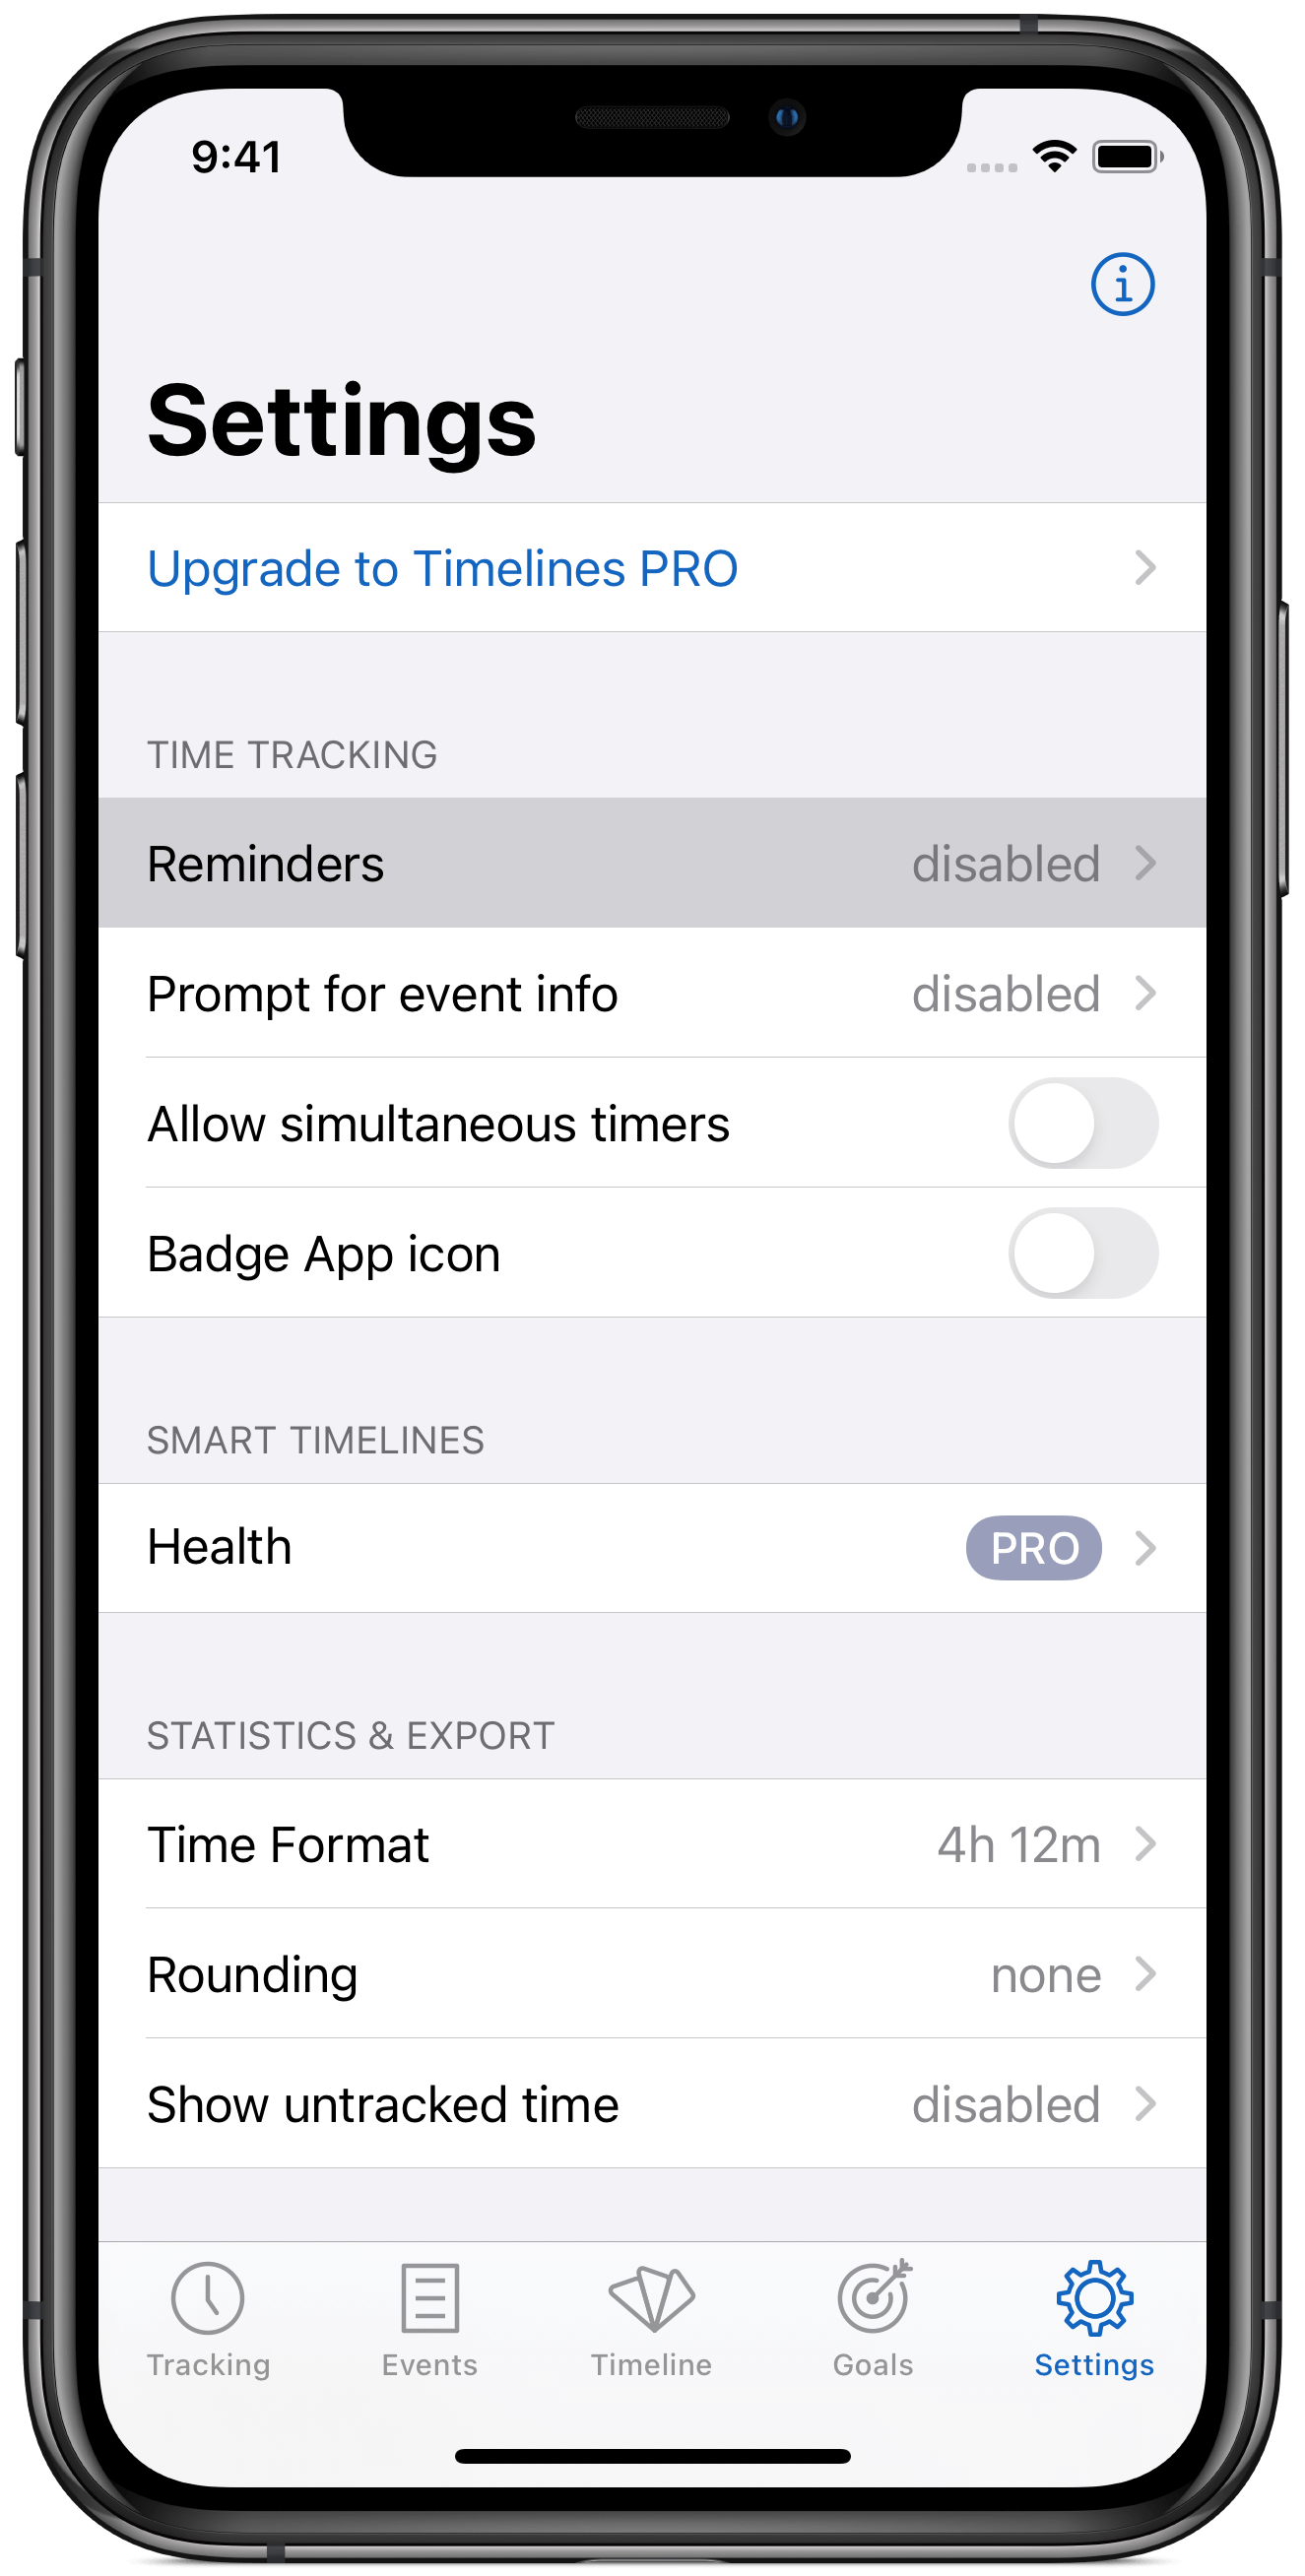
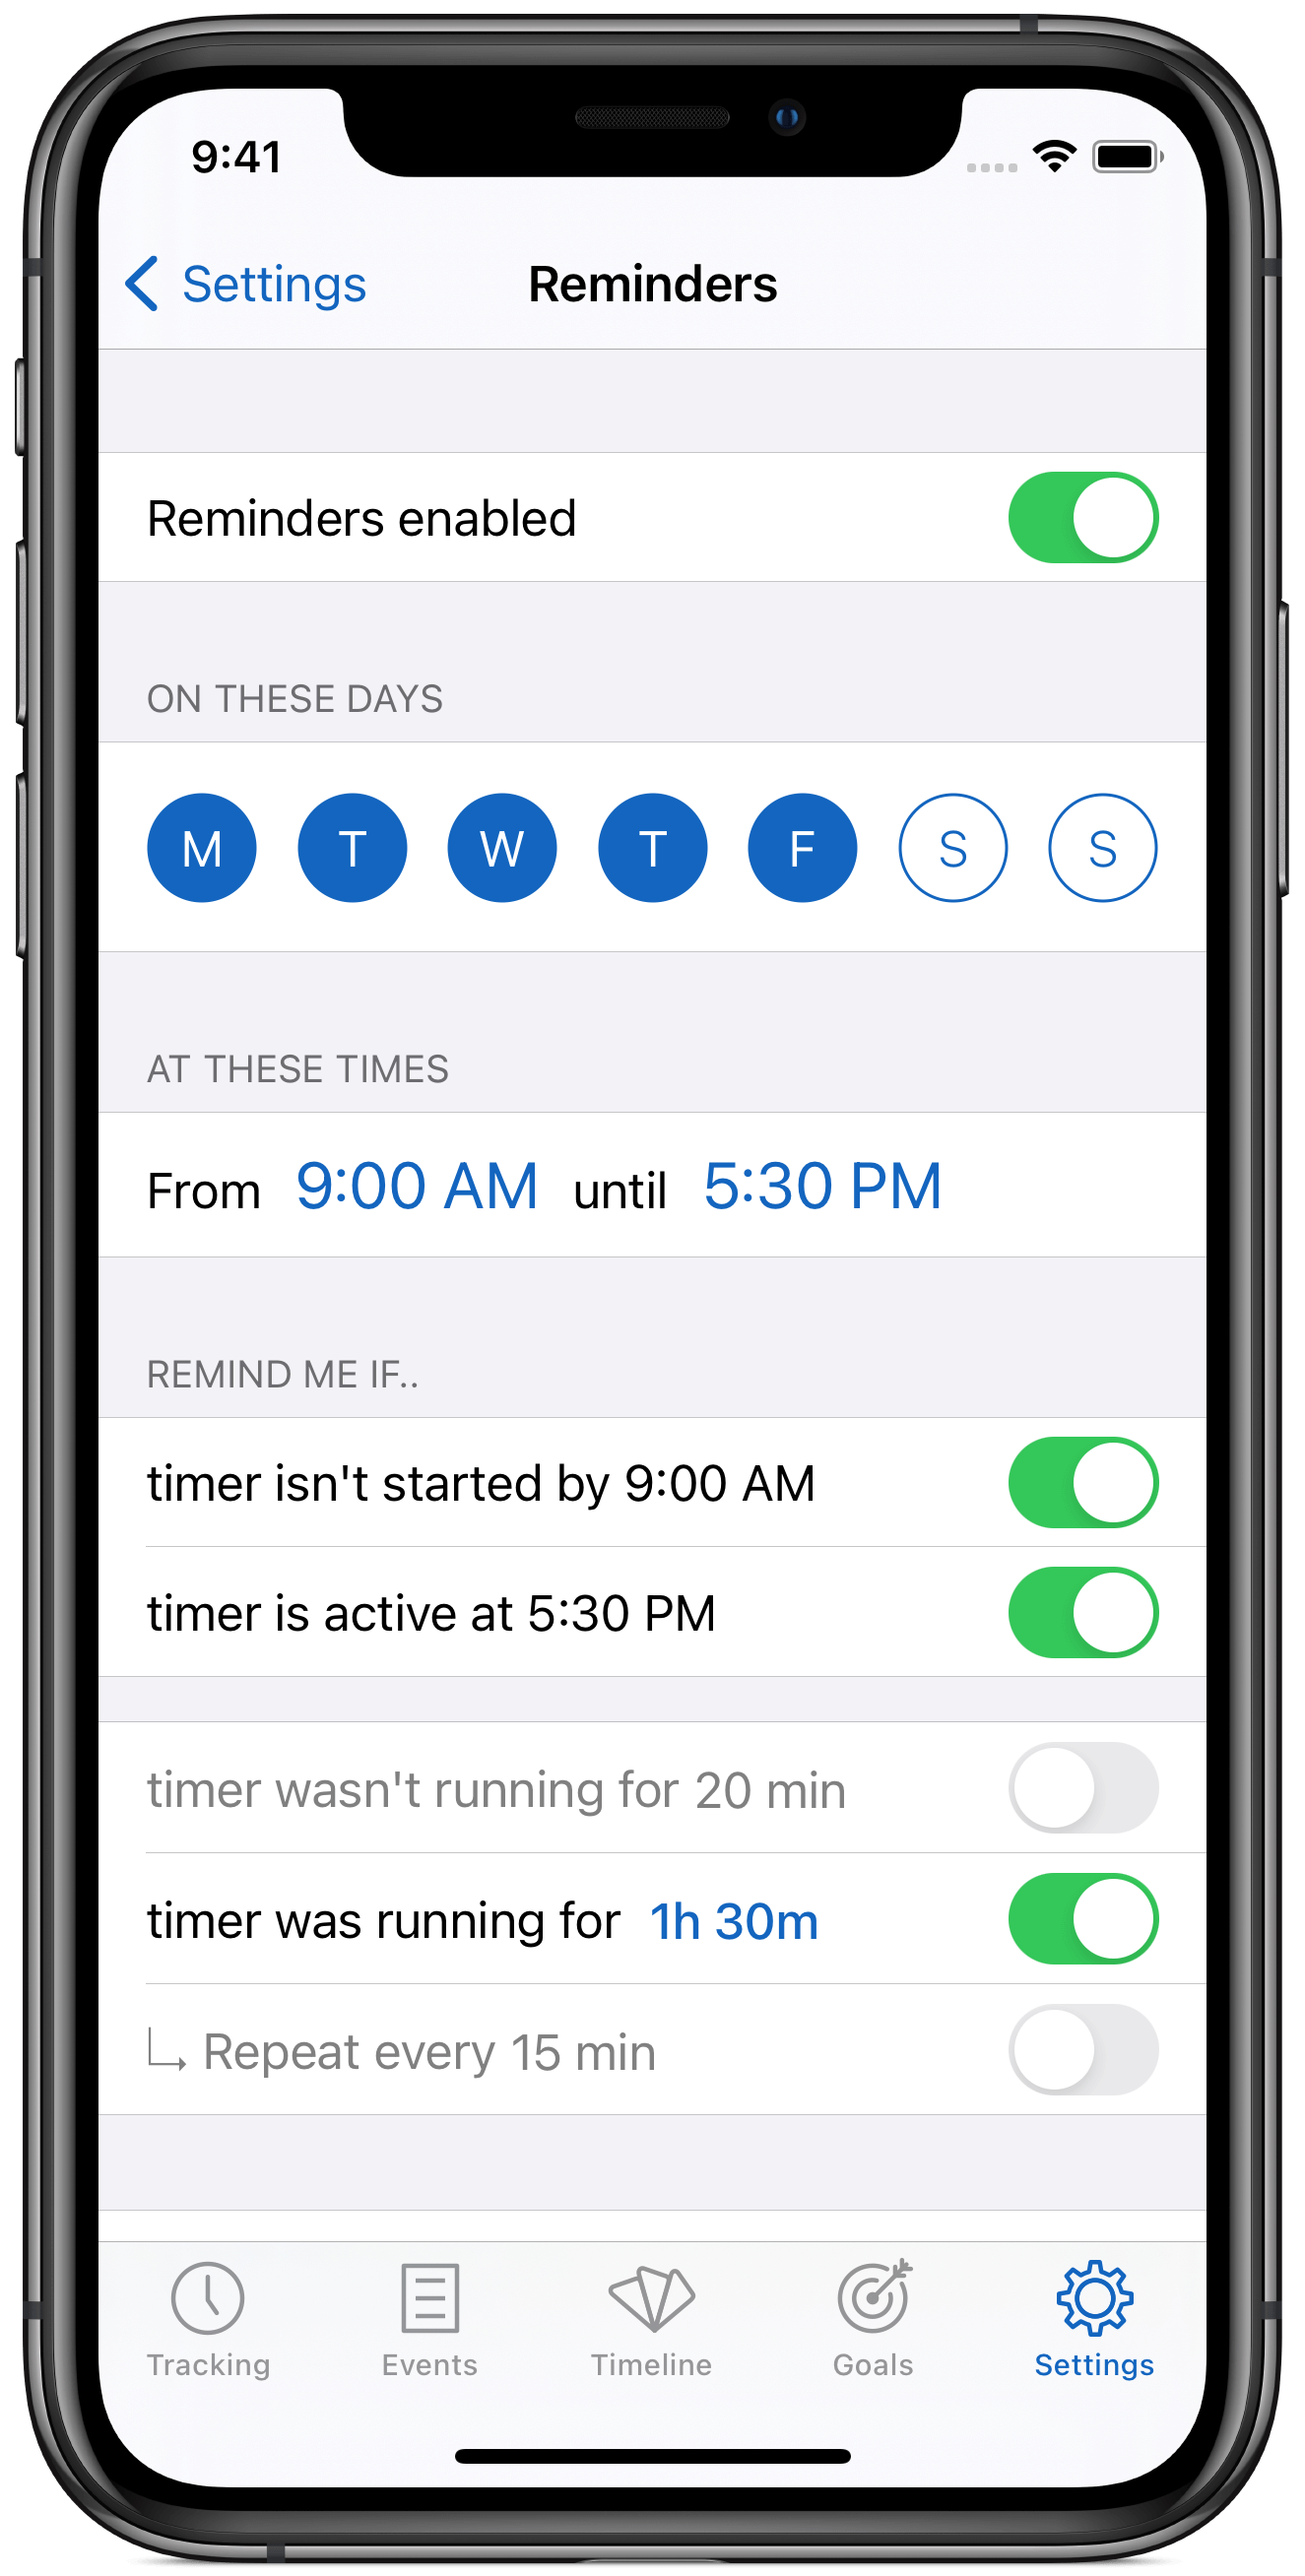
- At first, it can be difficult to remember to use timers. You can enable Reminders in Settings to get some help with not forgetting.
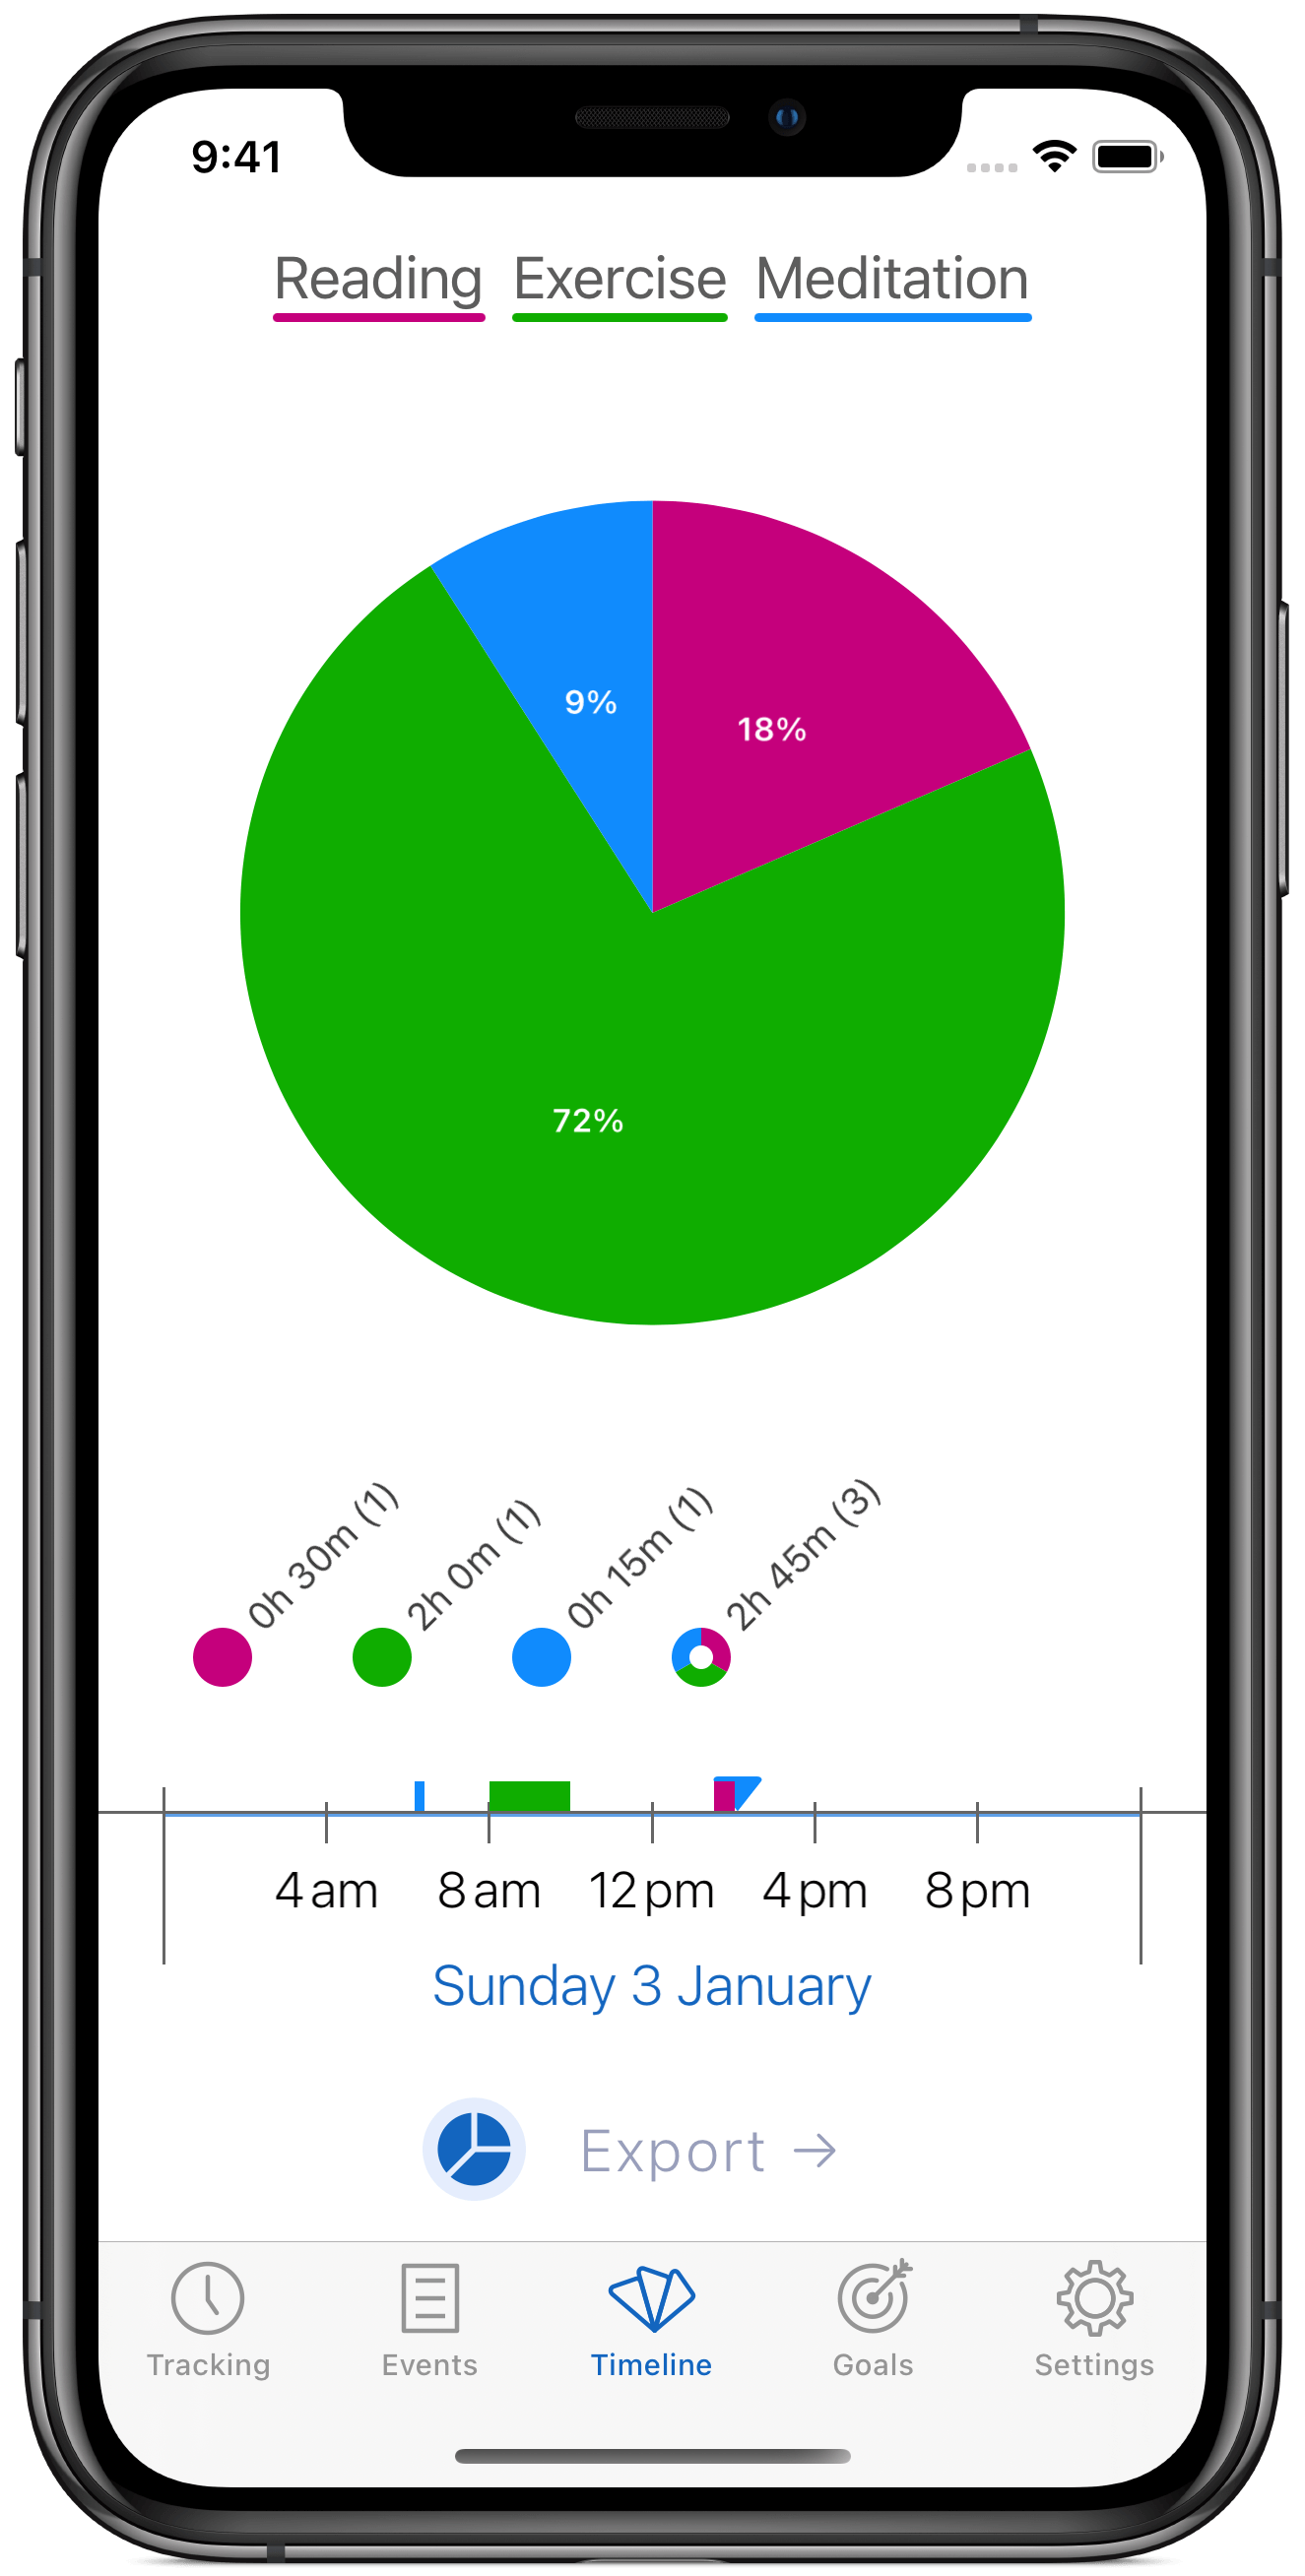
Reviewing your results and consistency
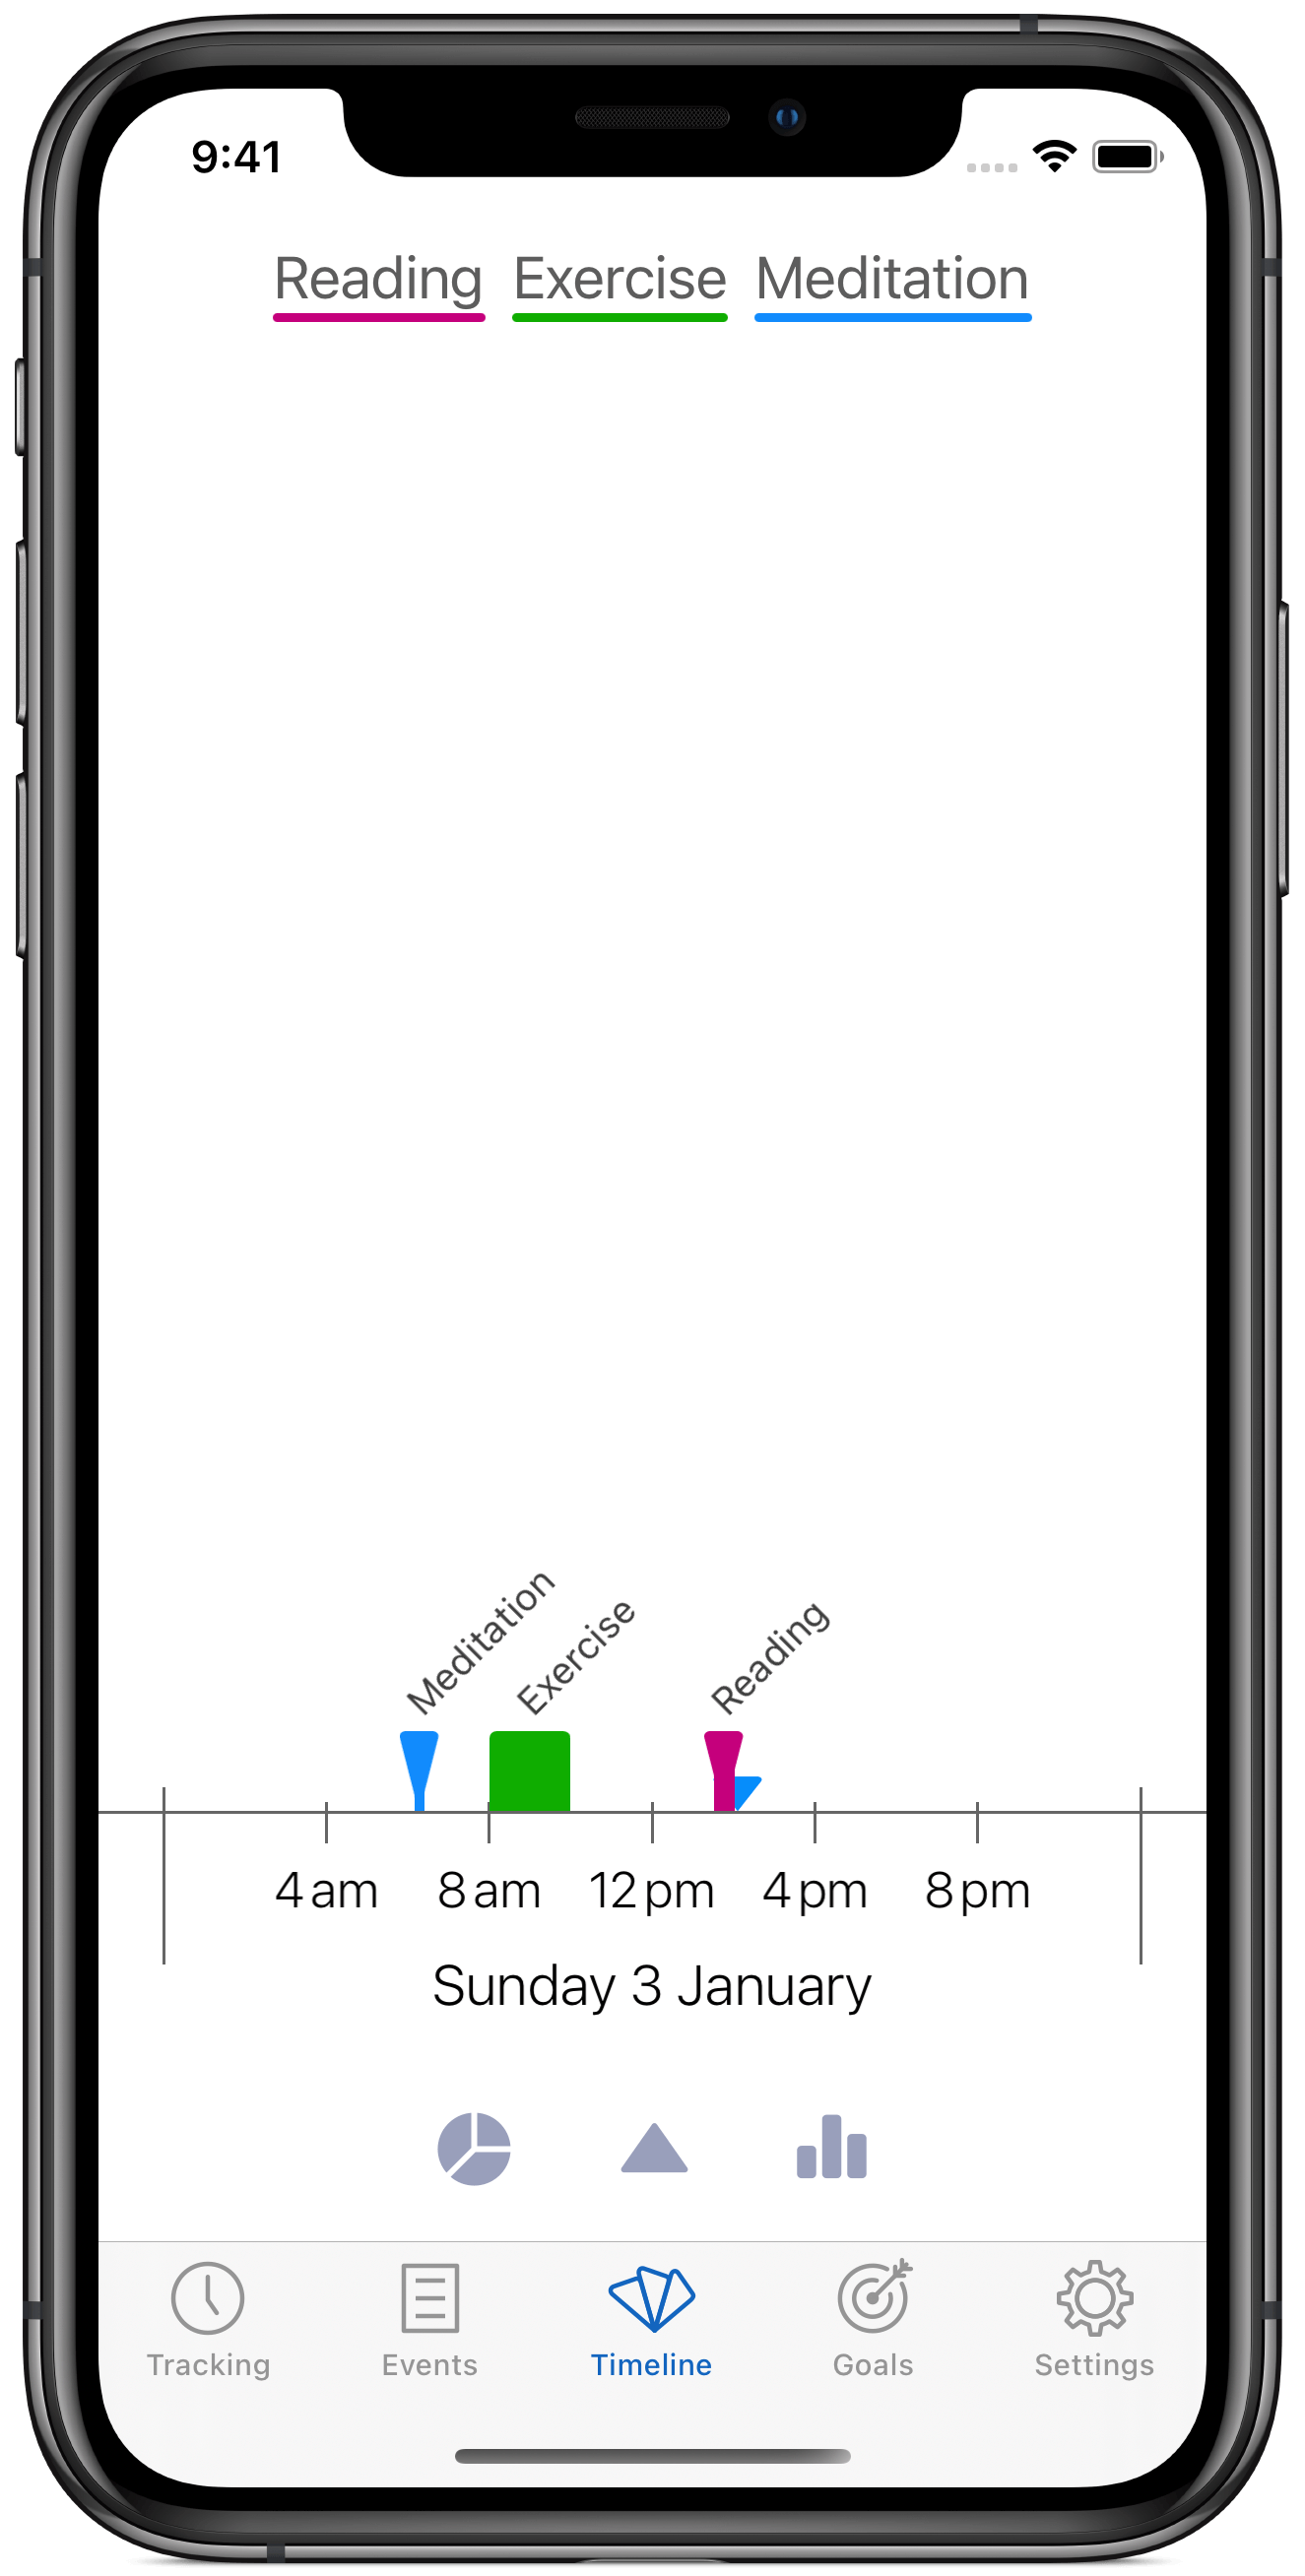
- In the Timeline tab, you can review your recorded time. You can zoom out by pinching with two fingers to see how you were doing over a longer period.
- You can tap the pie chart button to see tracked durations for each of your categories and for the visible period of time.
Setting up a home screen widget
To see your tracked time at a glance, you can add a widget to your home screen which will display how much time you spent on your resolutions during the last day, week, or month. To add a widget, follow these steps:
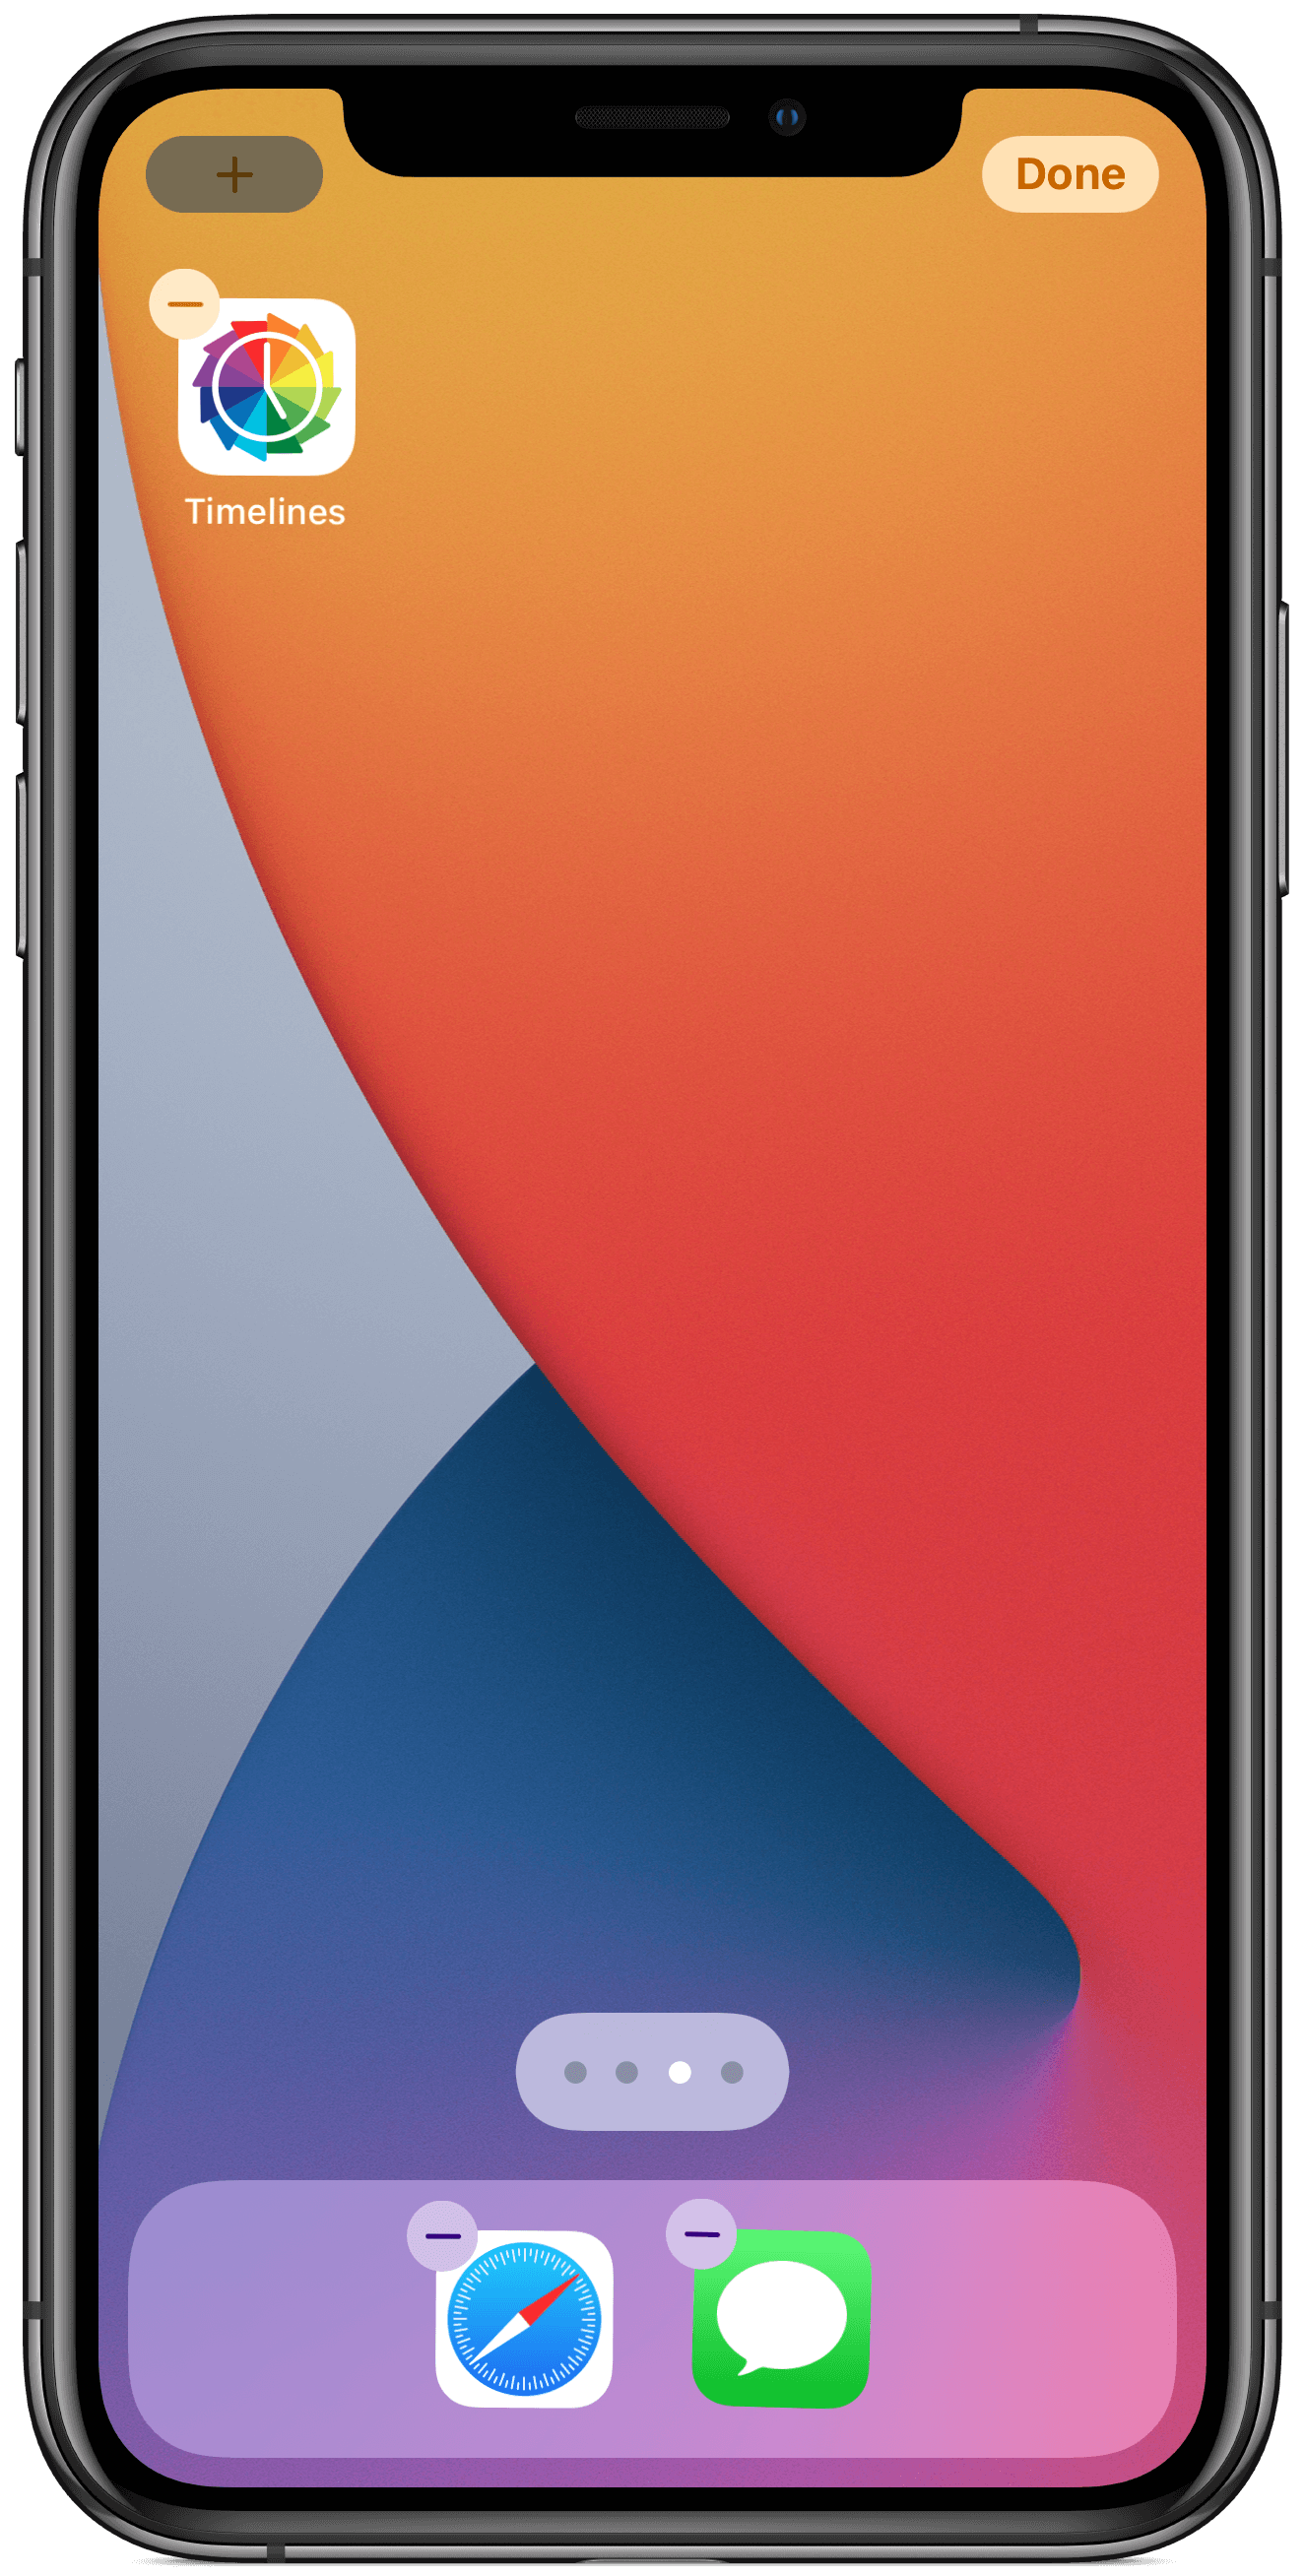
- Long-press anywhere your home screen
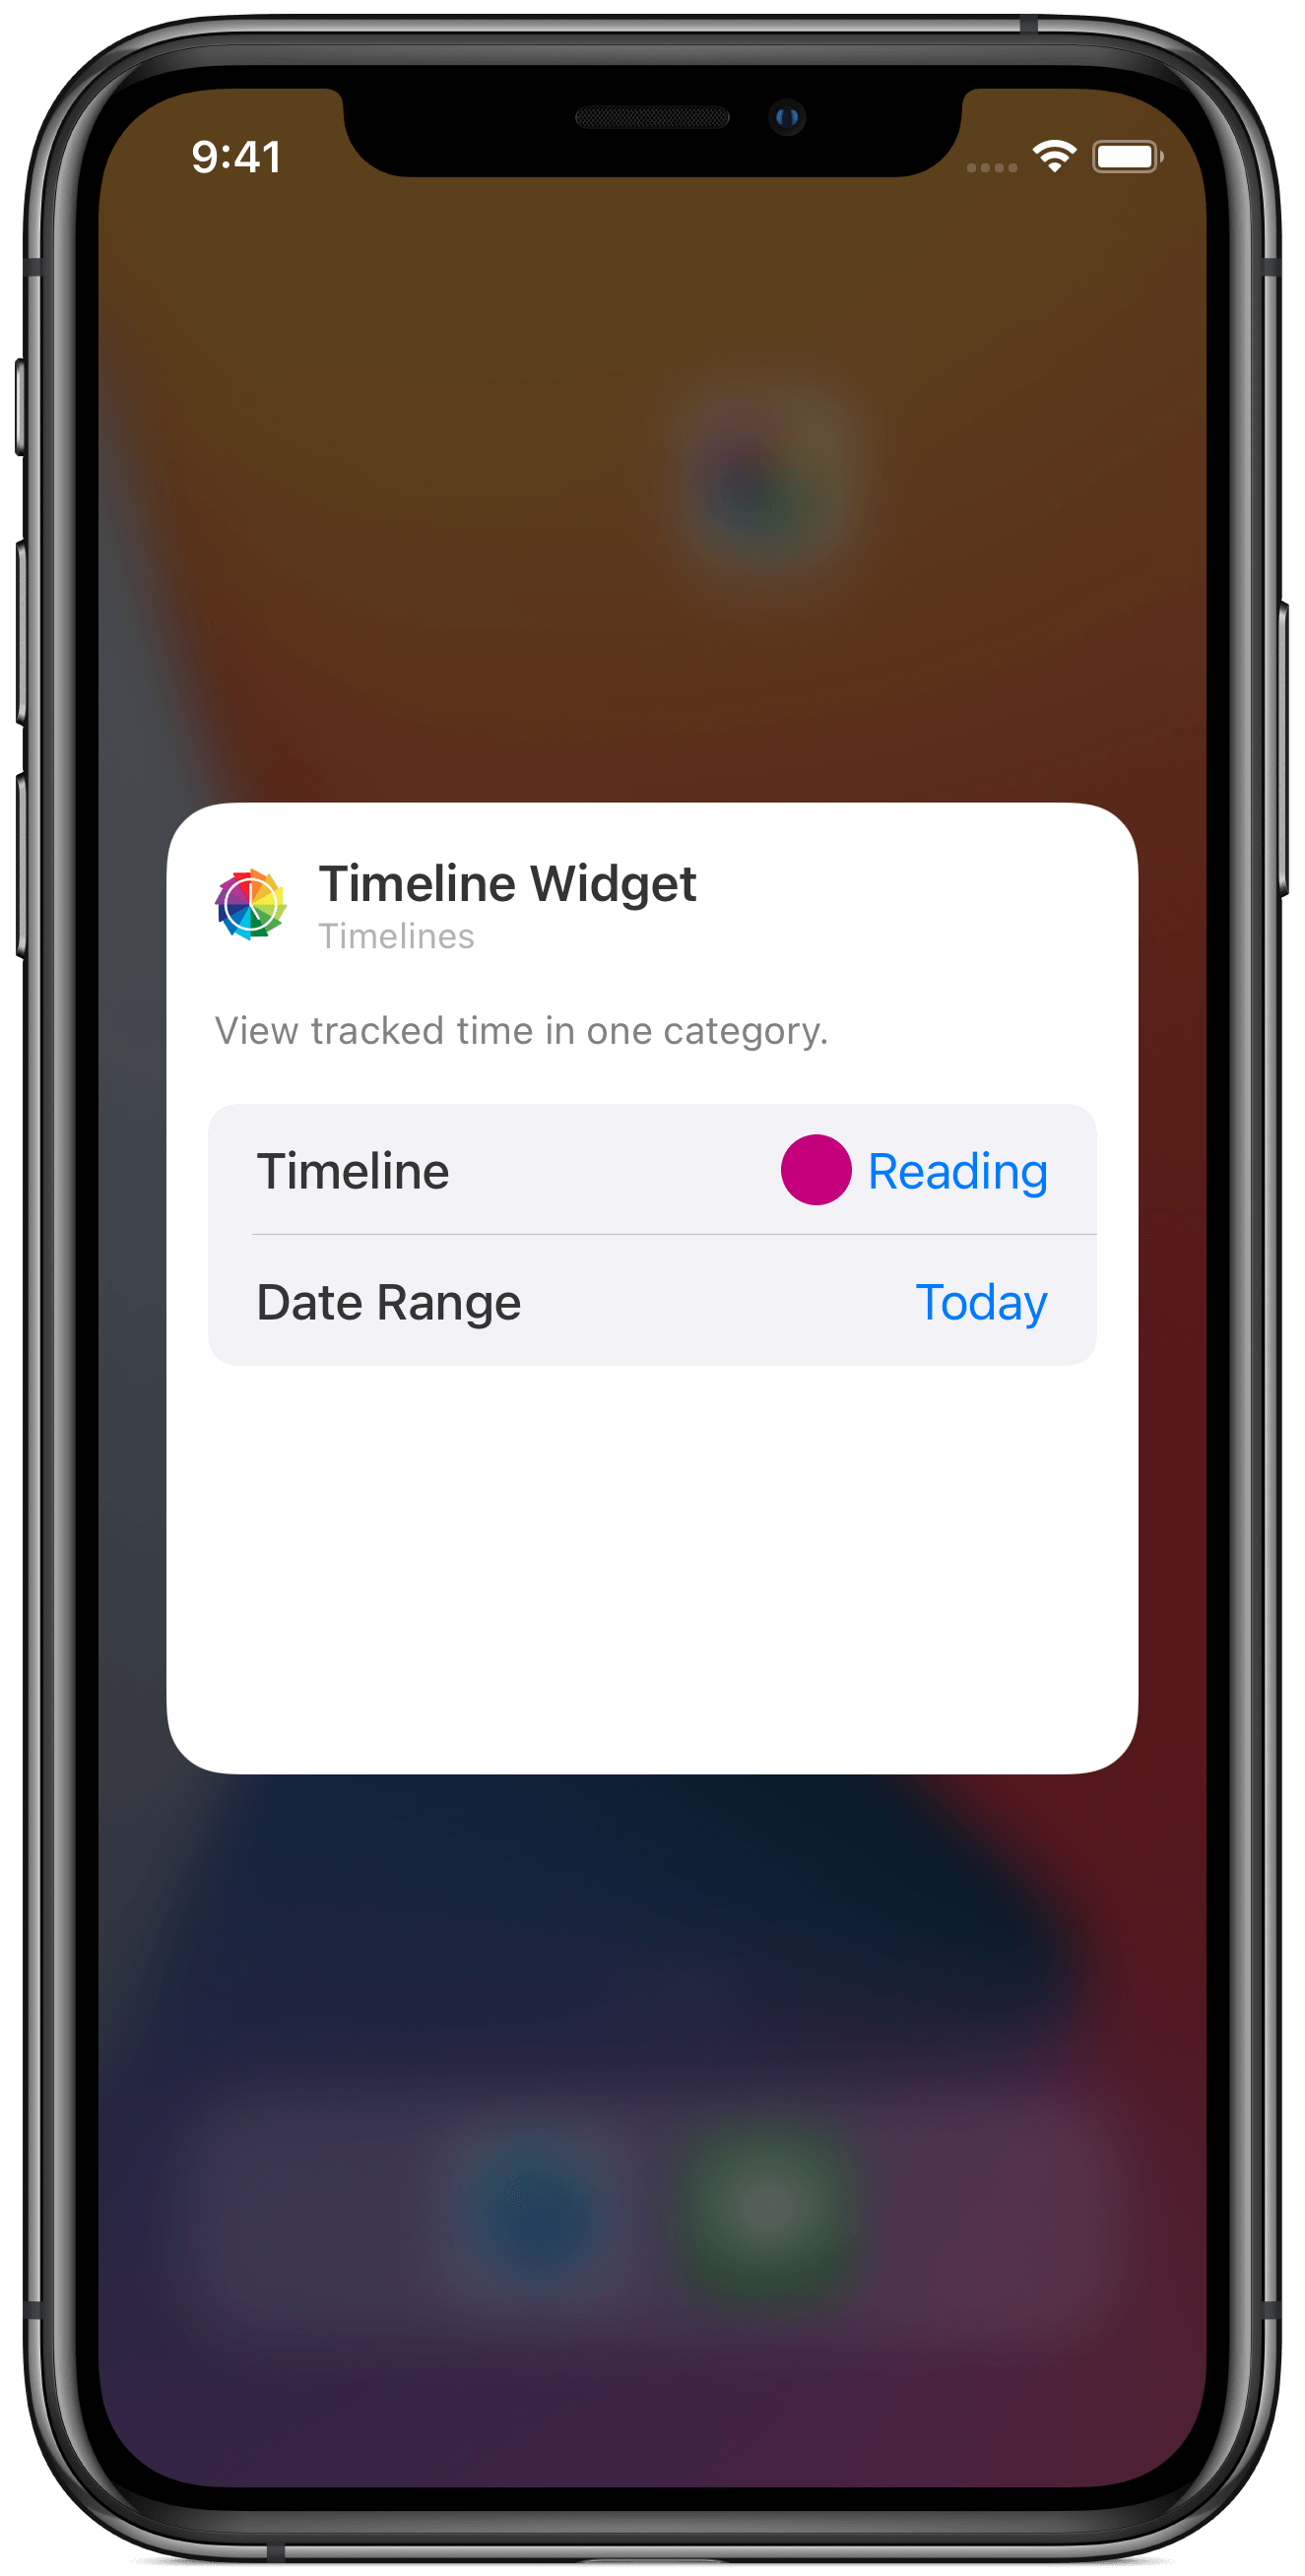
- Tap the '+' button in the upper left corner. Then, search for Timelines, and select the Timeline Widget
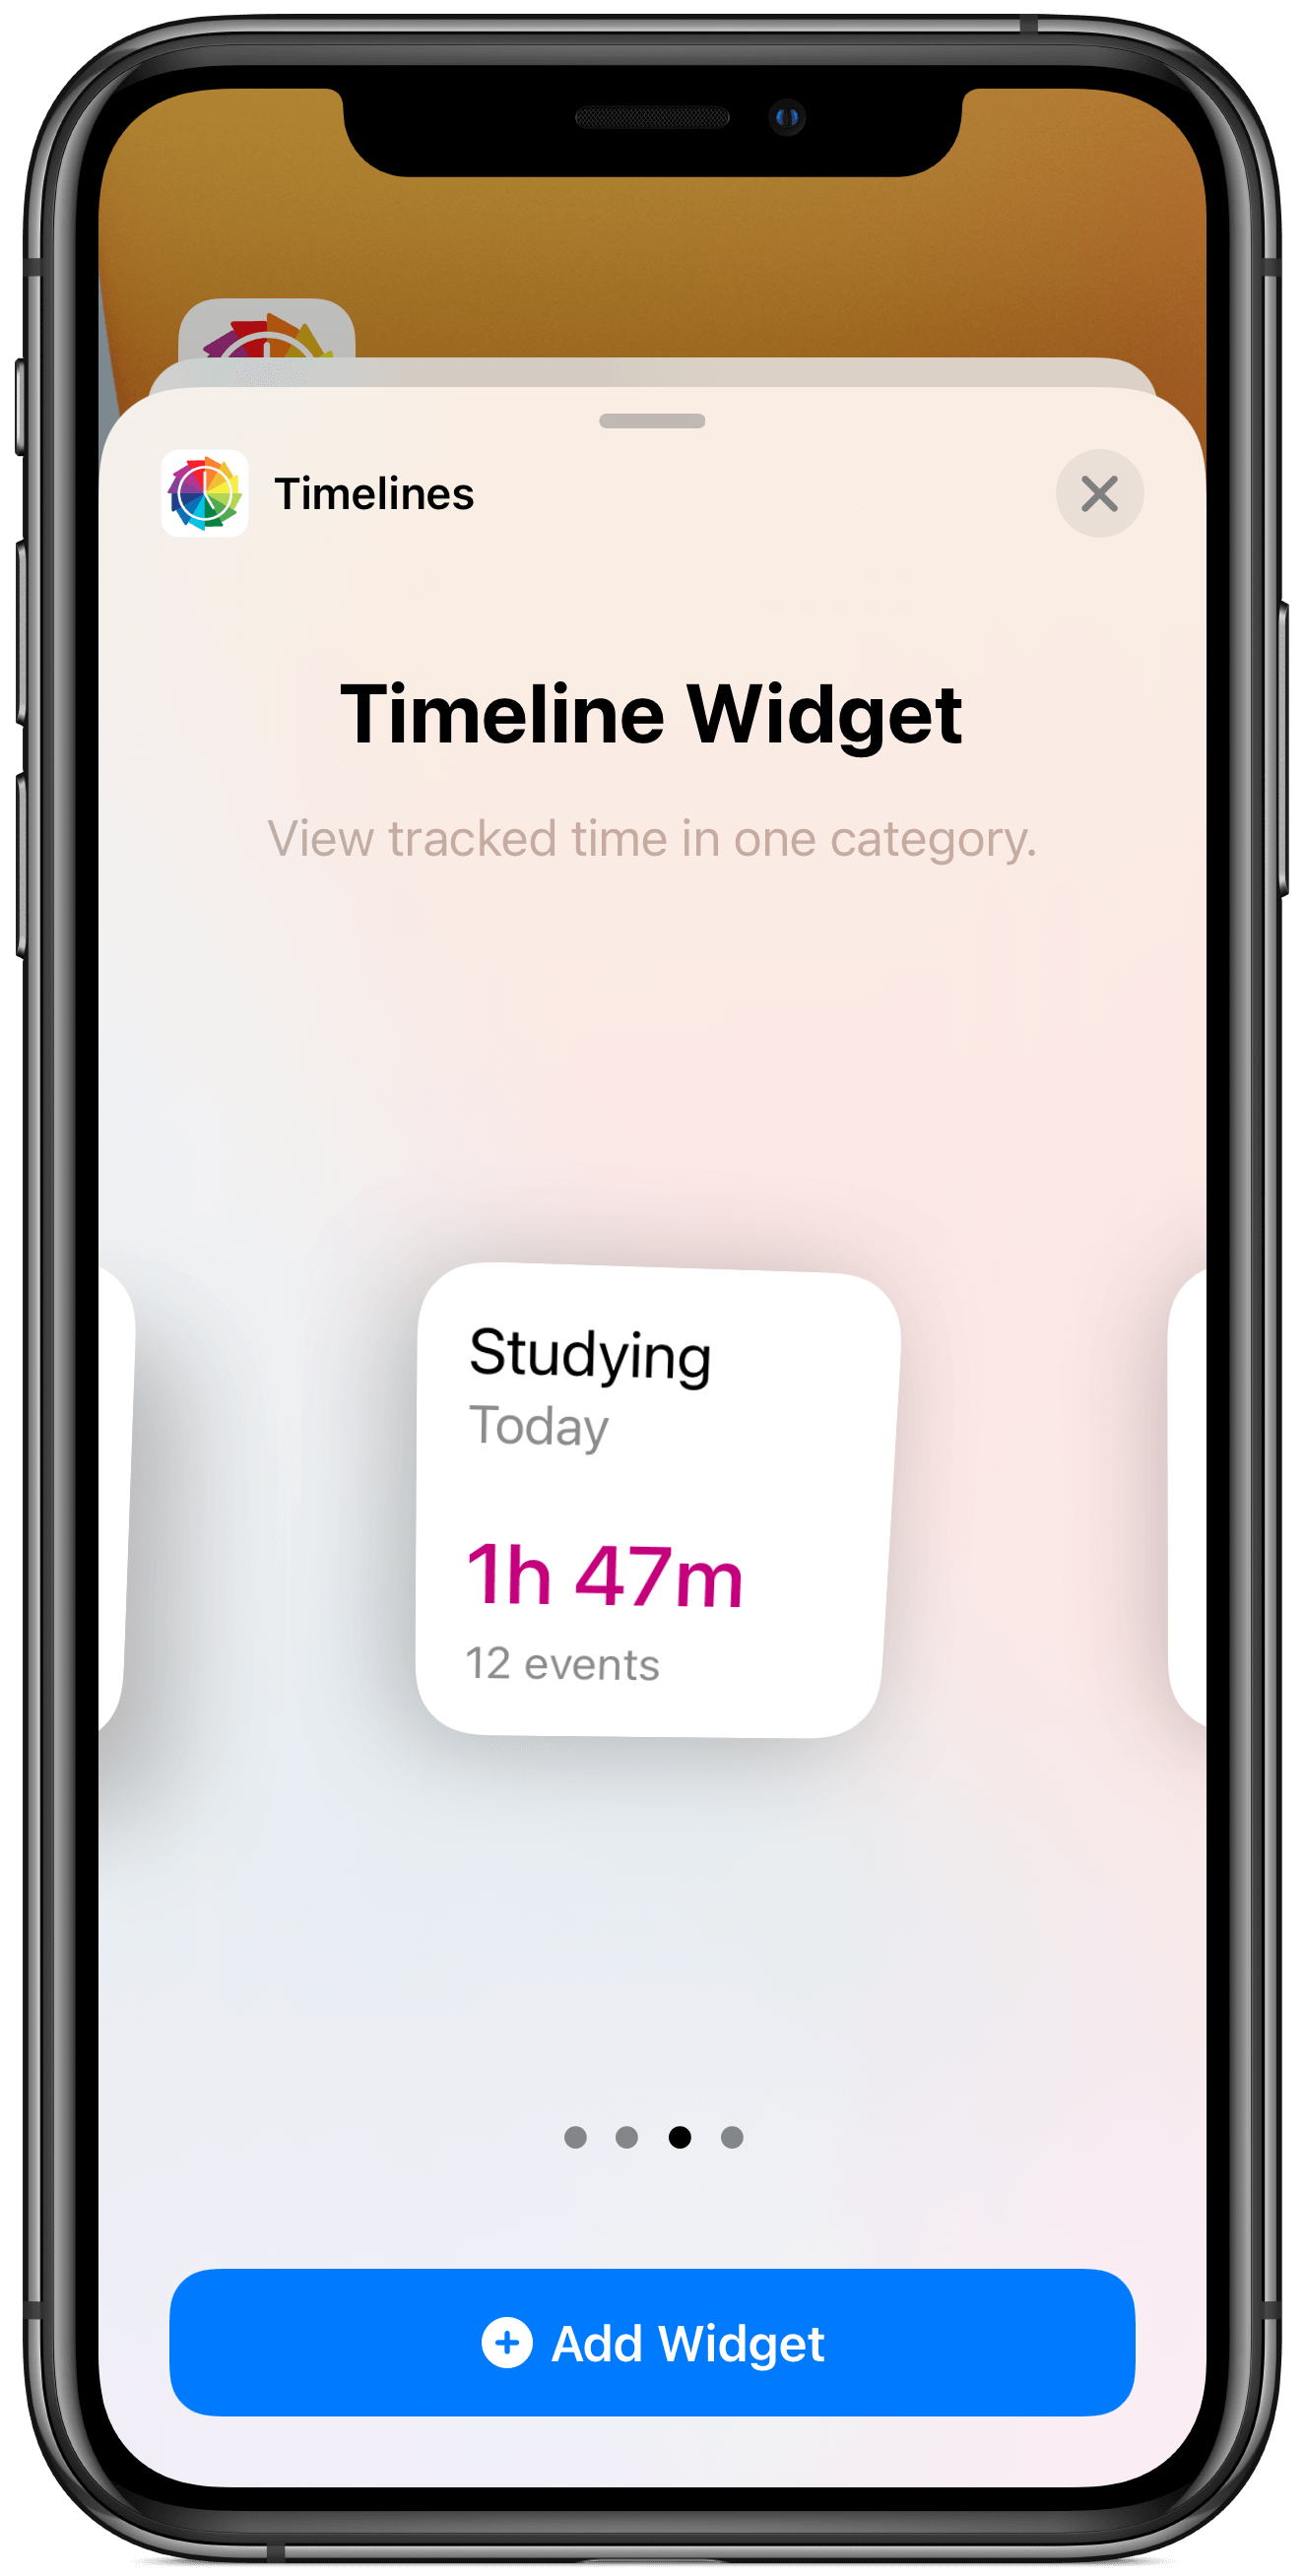
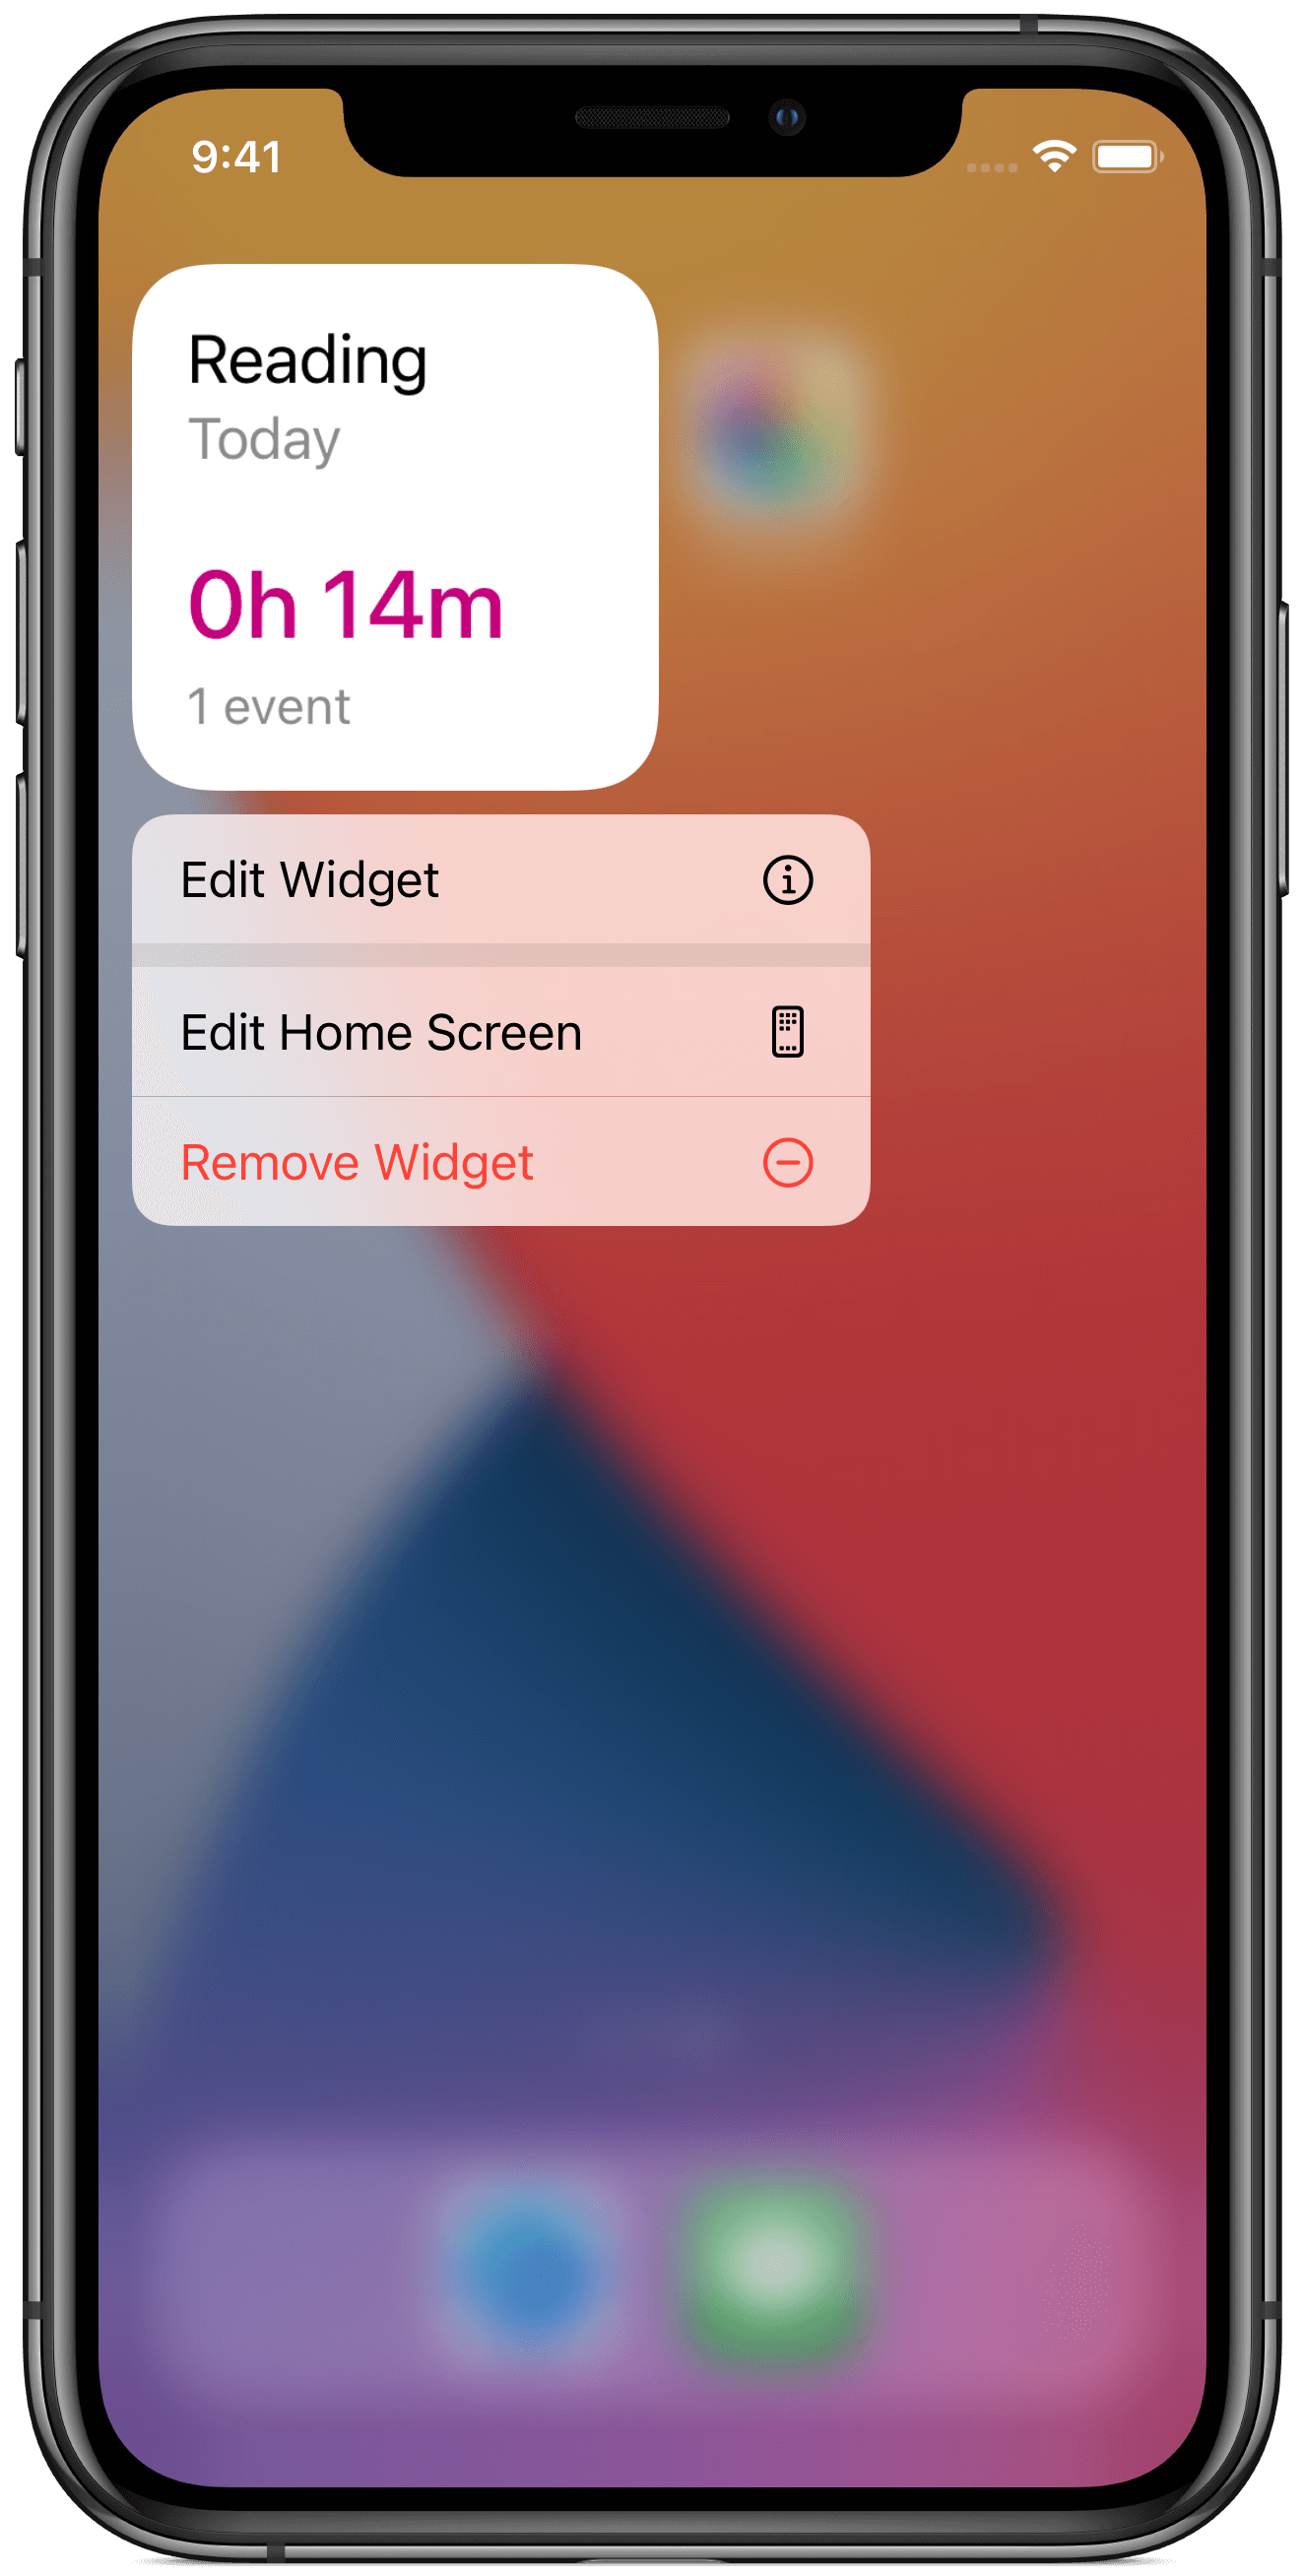
- Here's what the widget looks like when placed on the home screen:
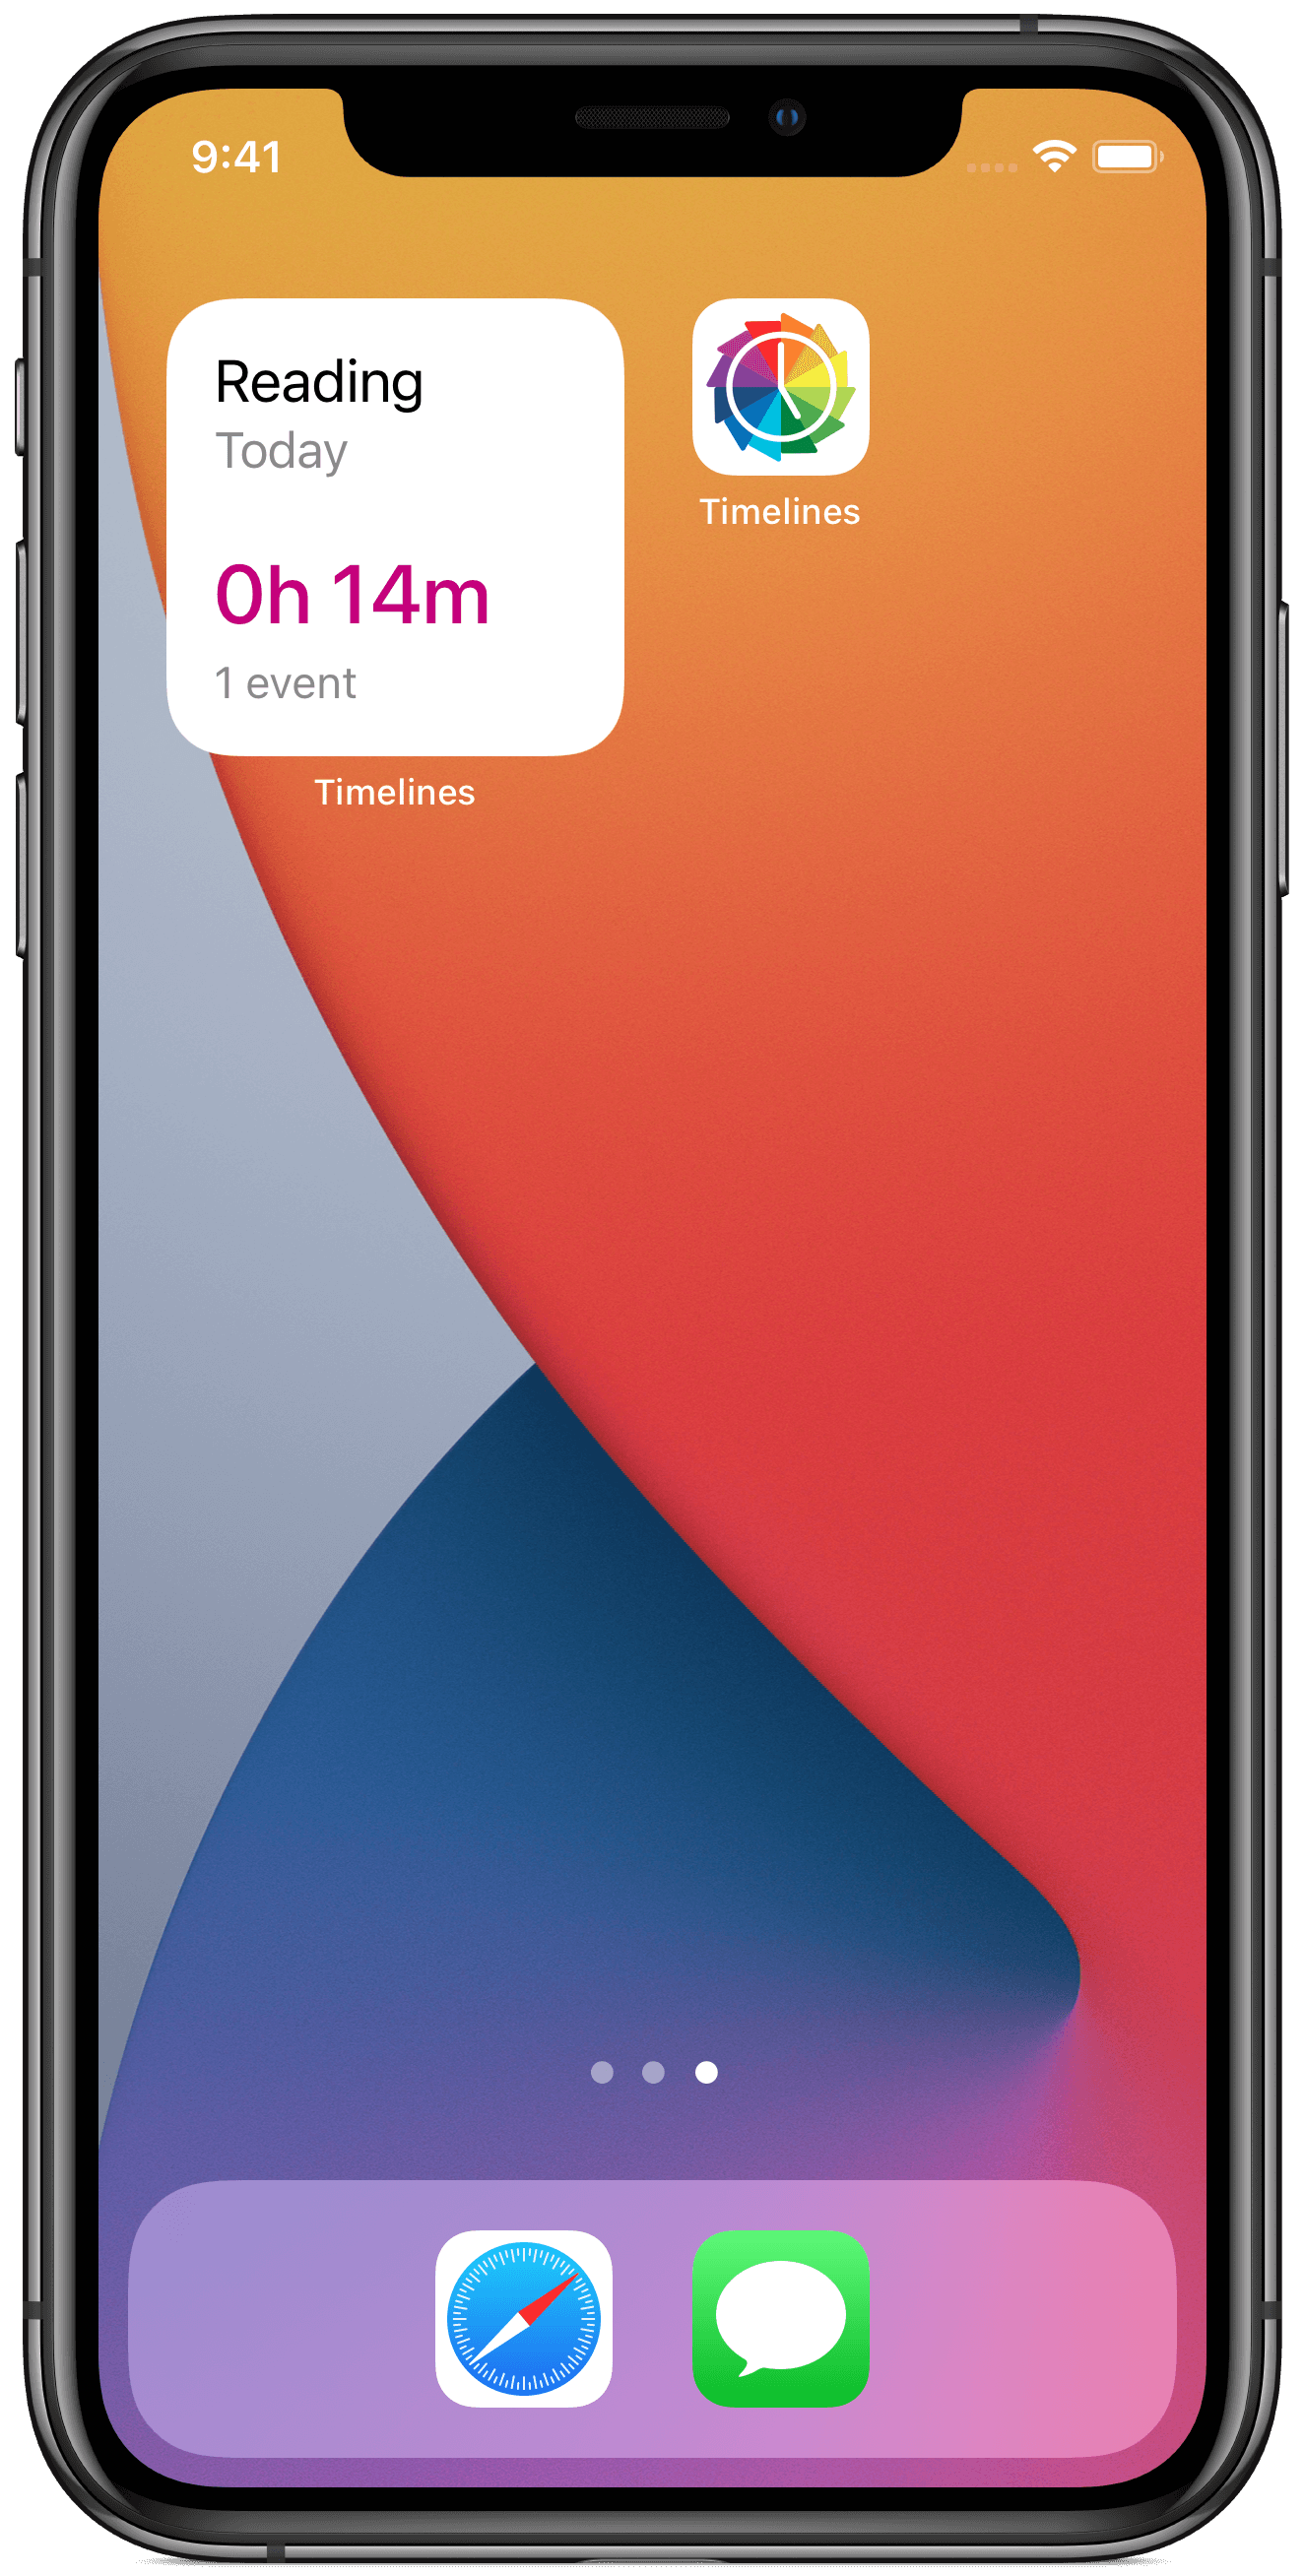
- Once added to your home screen, you can long-touch on it and tap Edit widget to select which timeline (resolution) should be shown.
By having a permanent record of how you were adhering to your resolutions, and by taking the time regularly to reflect on how you are sticking with your plans using the Timeline tab, you can significantly increase the likelihood that you will maintain your resolutions in the longterm - turning them into an integral part of your life.
So far, everything that was mentioned you can do completely for free, with the free version of Timelines. If you want to get more motivation and increase your chances even more, the following sections will be for you. They require Timelines PRO, which at the time of this writing costs only $19.99/year or $3.99/month.
Striving to reach your time goals
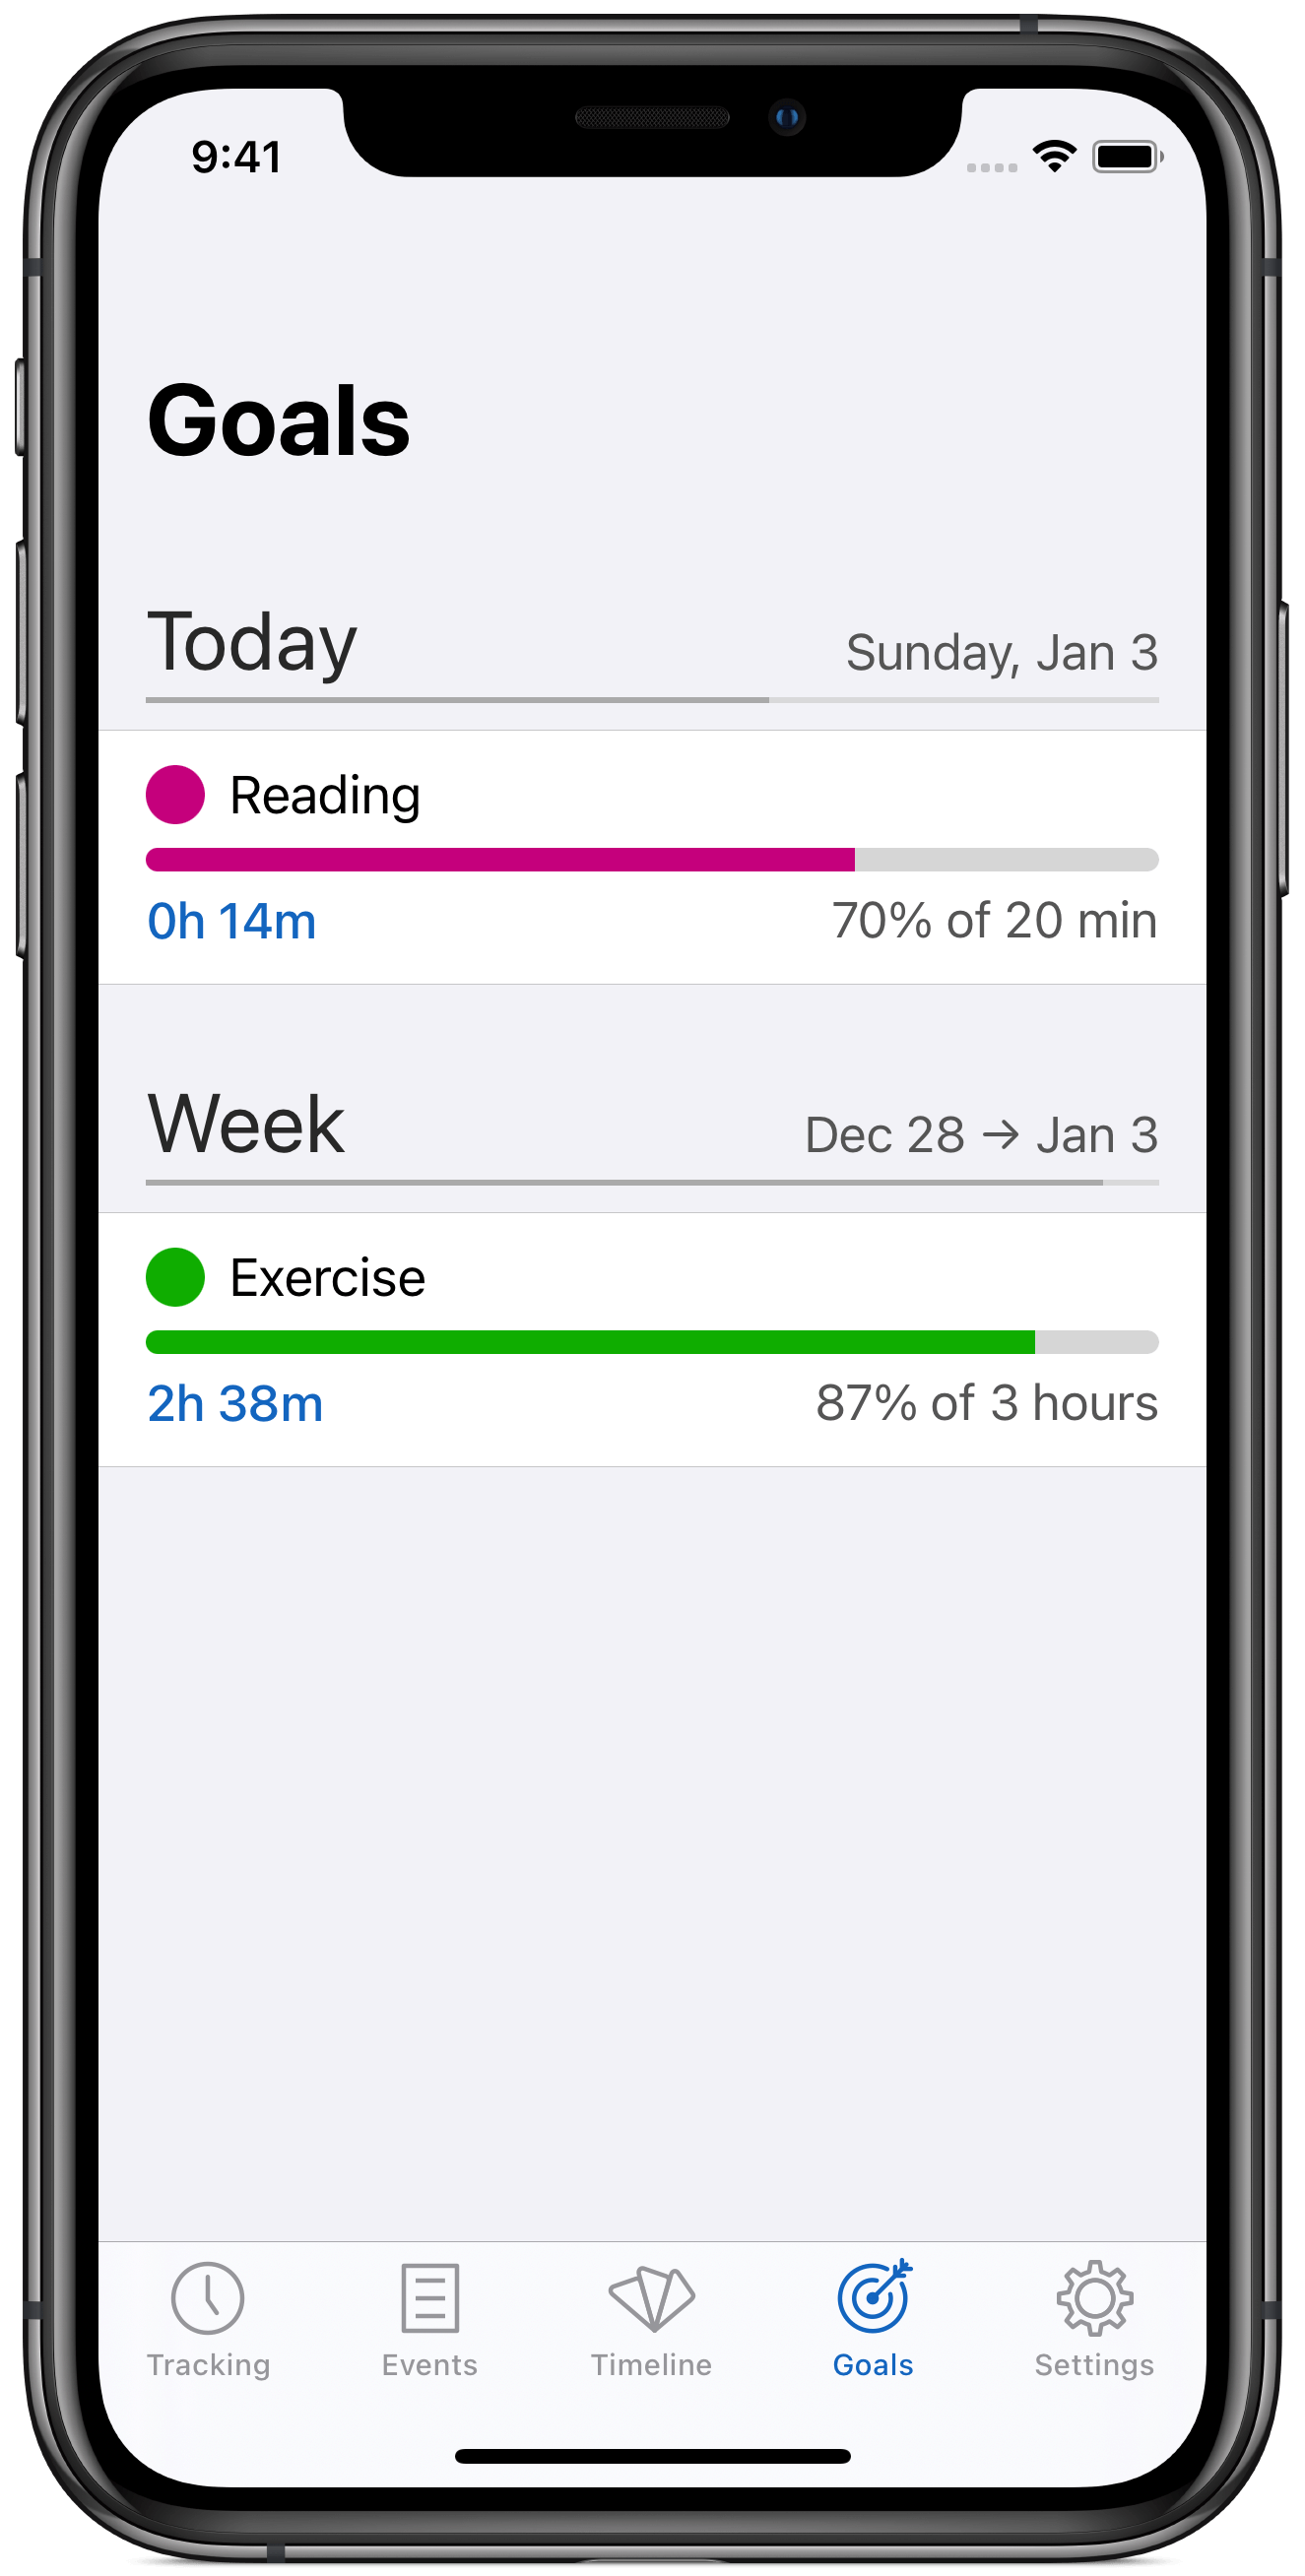
It's common for New Year's resolutions to define them in terms of how much time you want to be spending doing something. In our example, let's say I want to read for 20 minutes a day. And that I want to exercise for at least 3 hours per week.
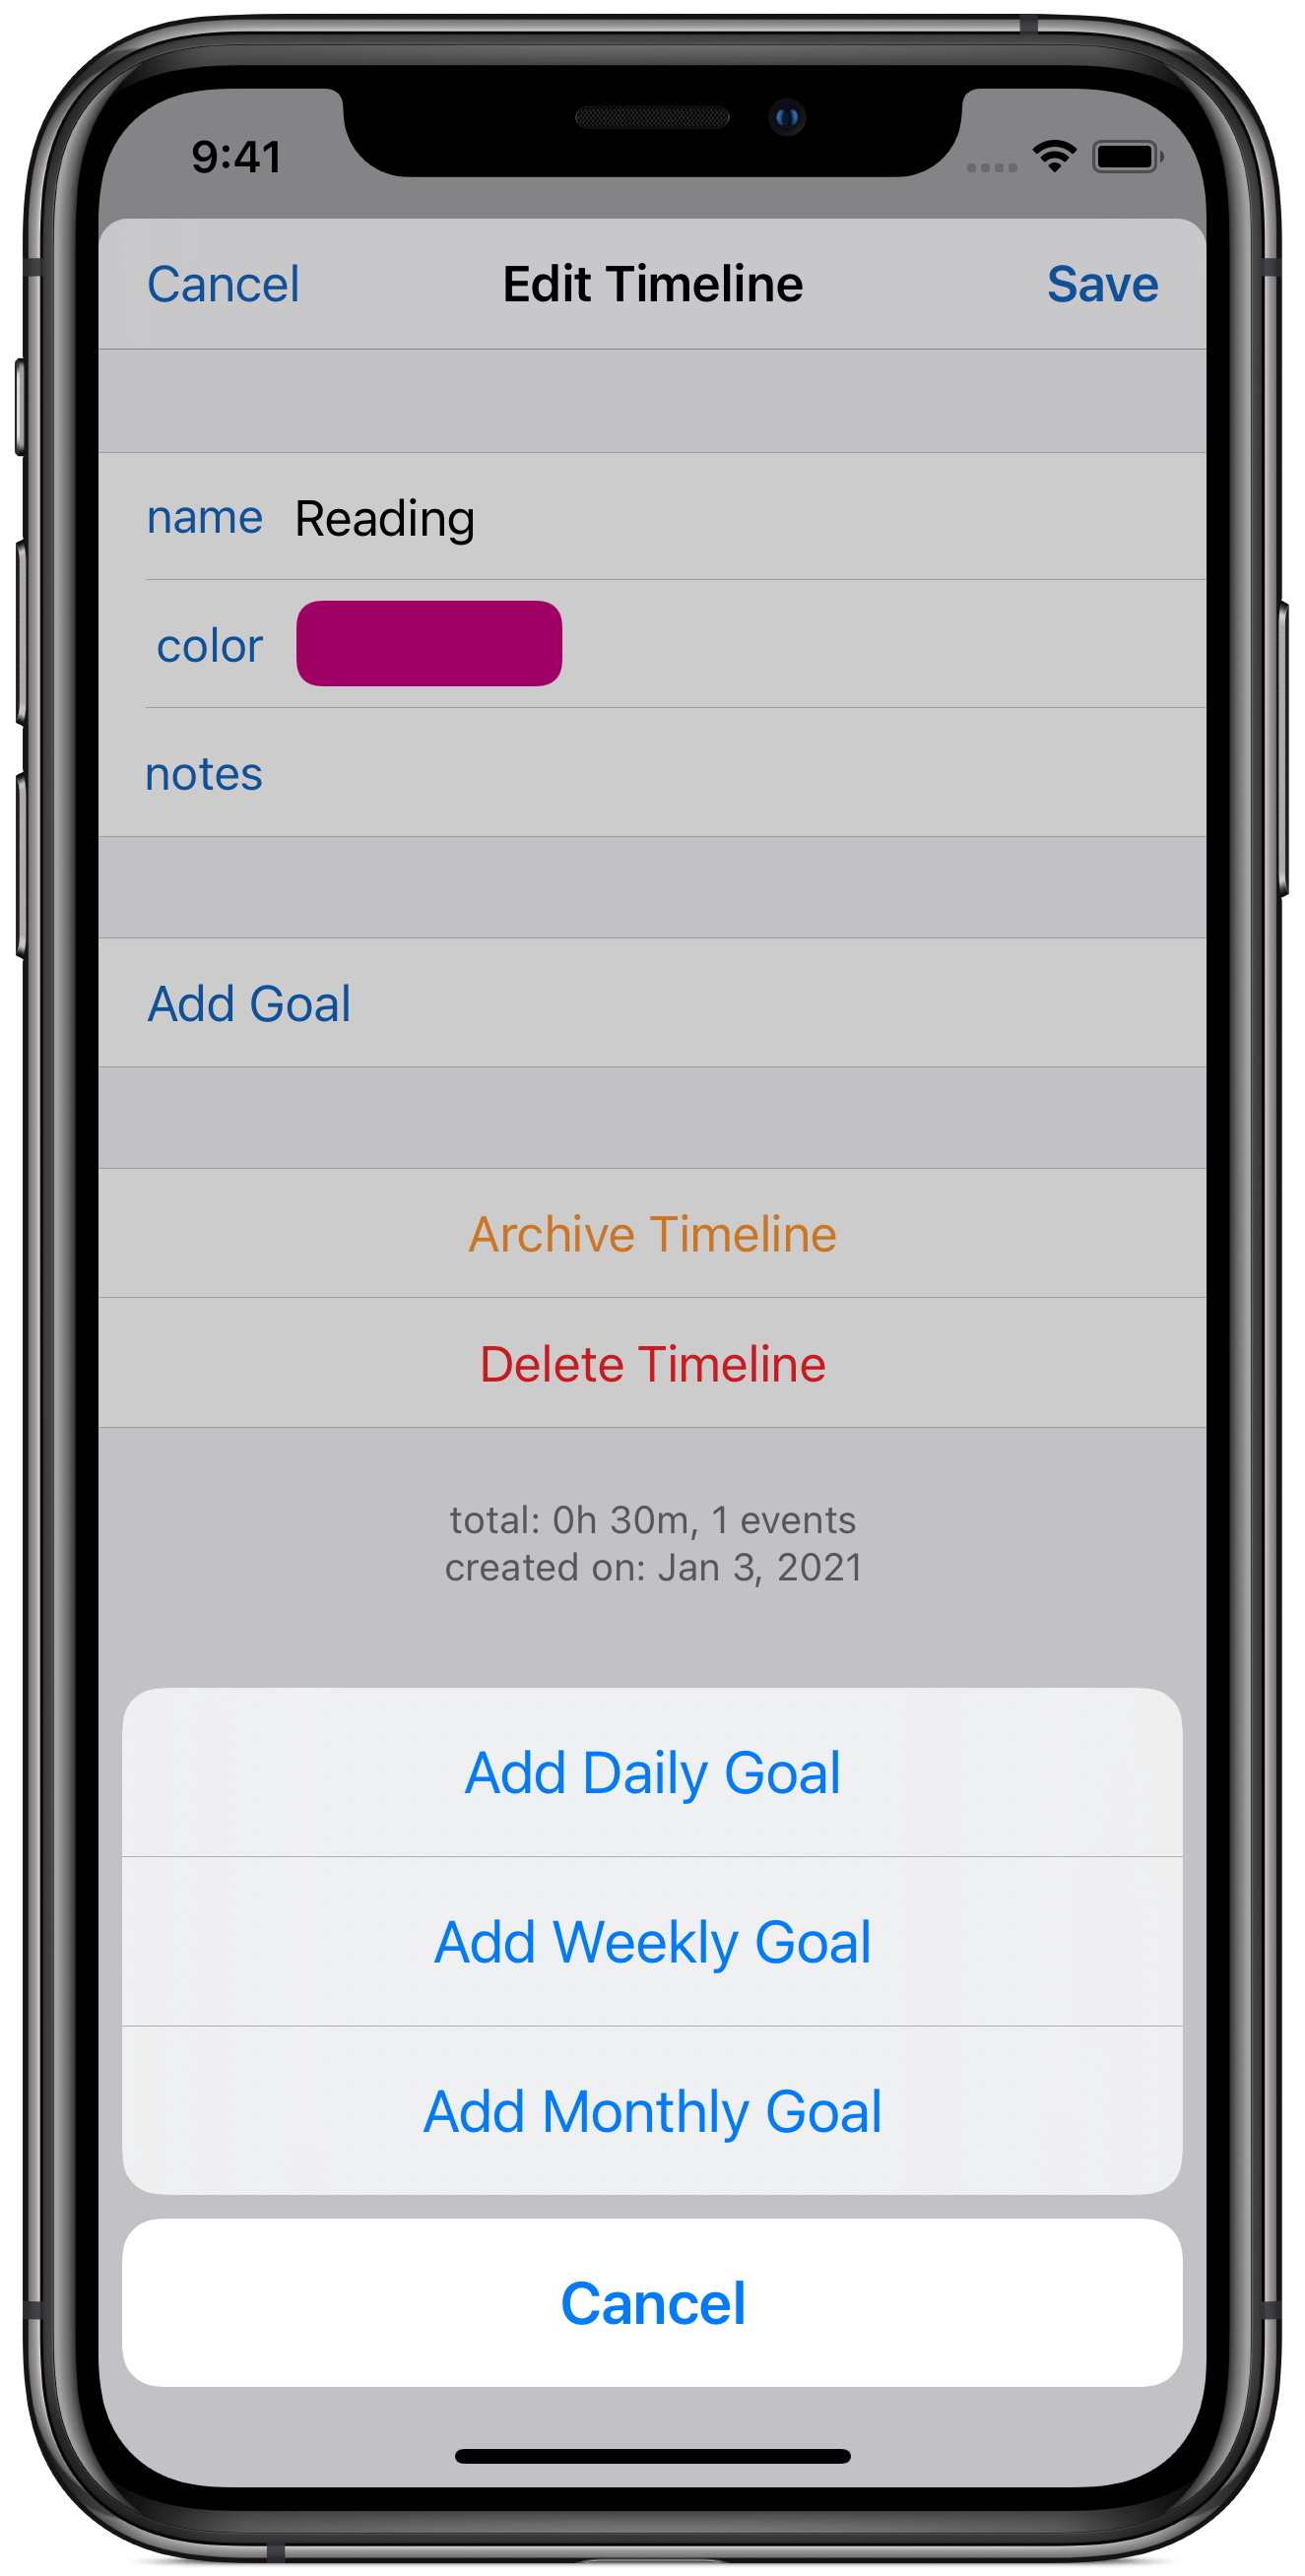
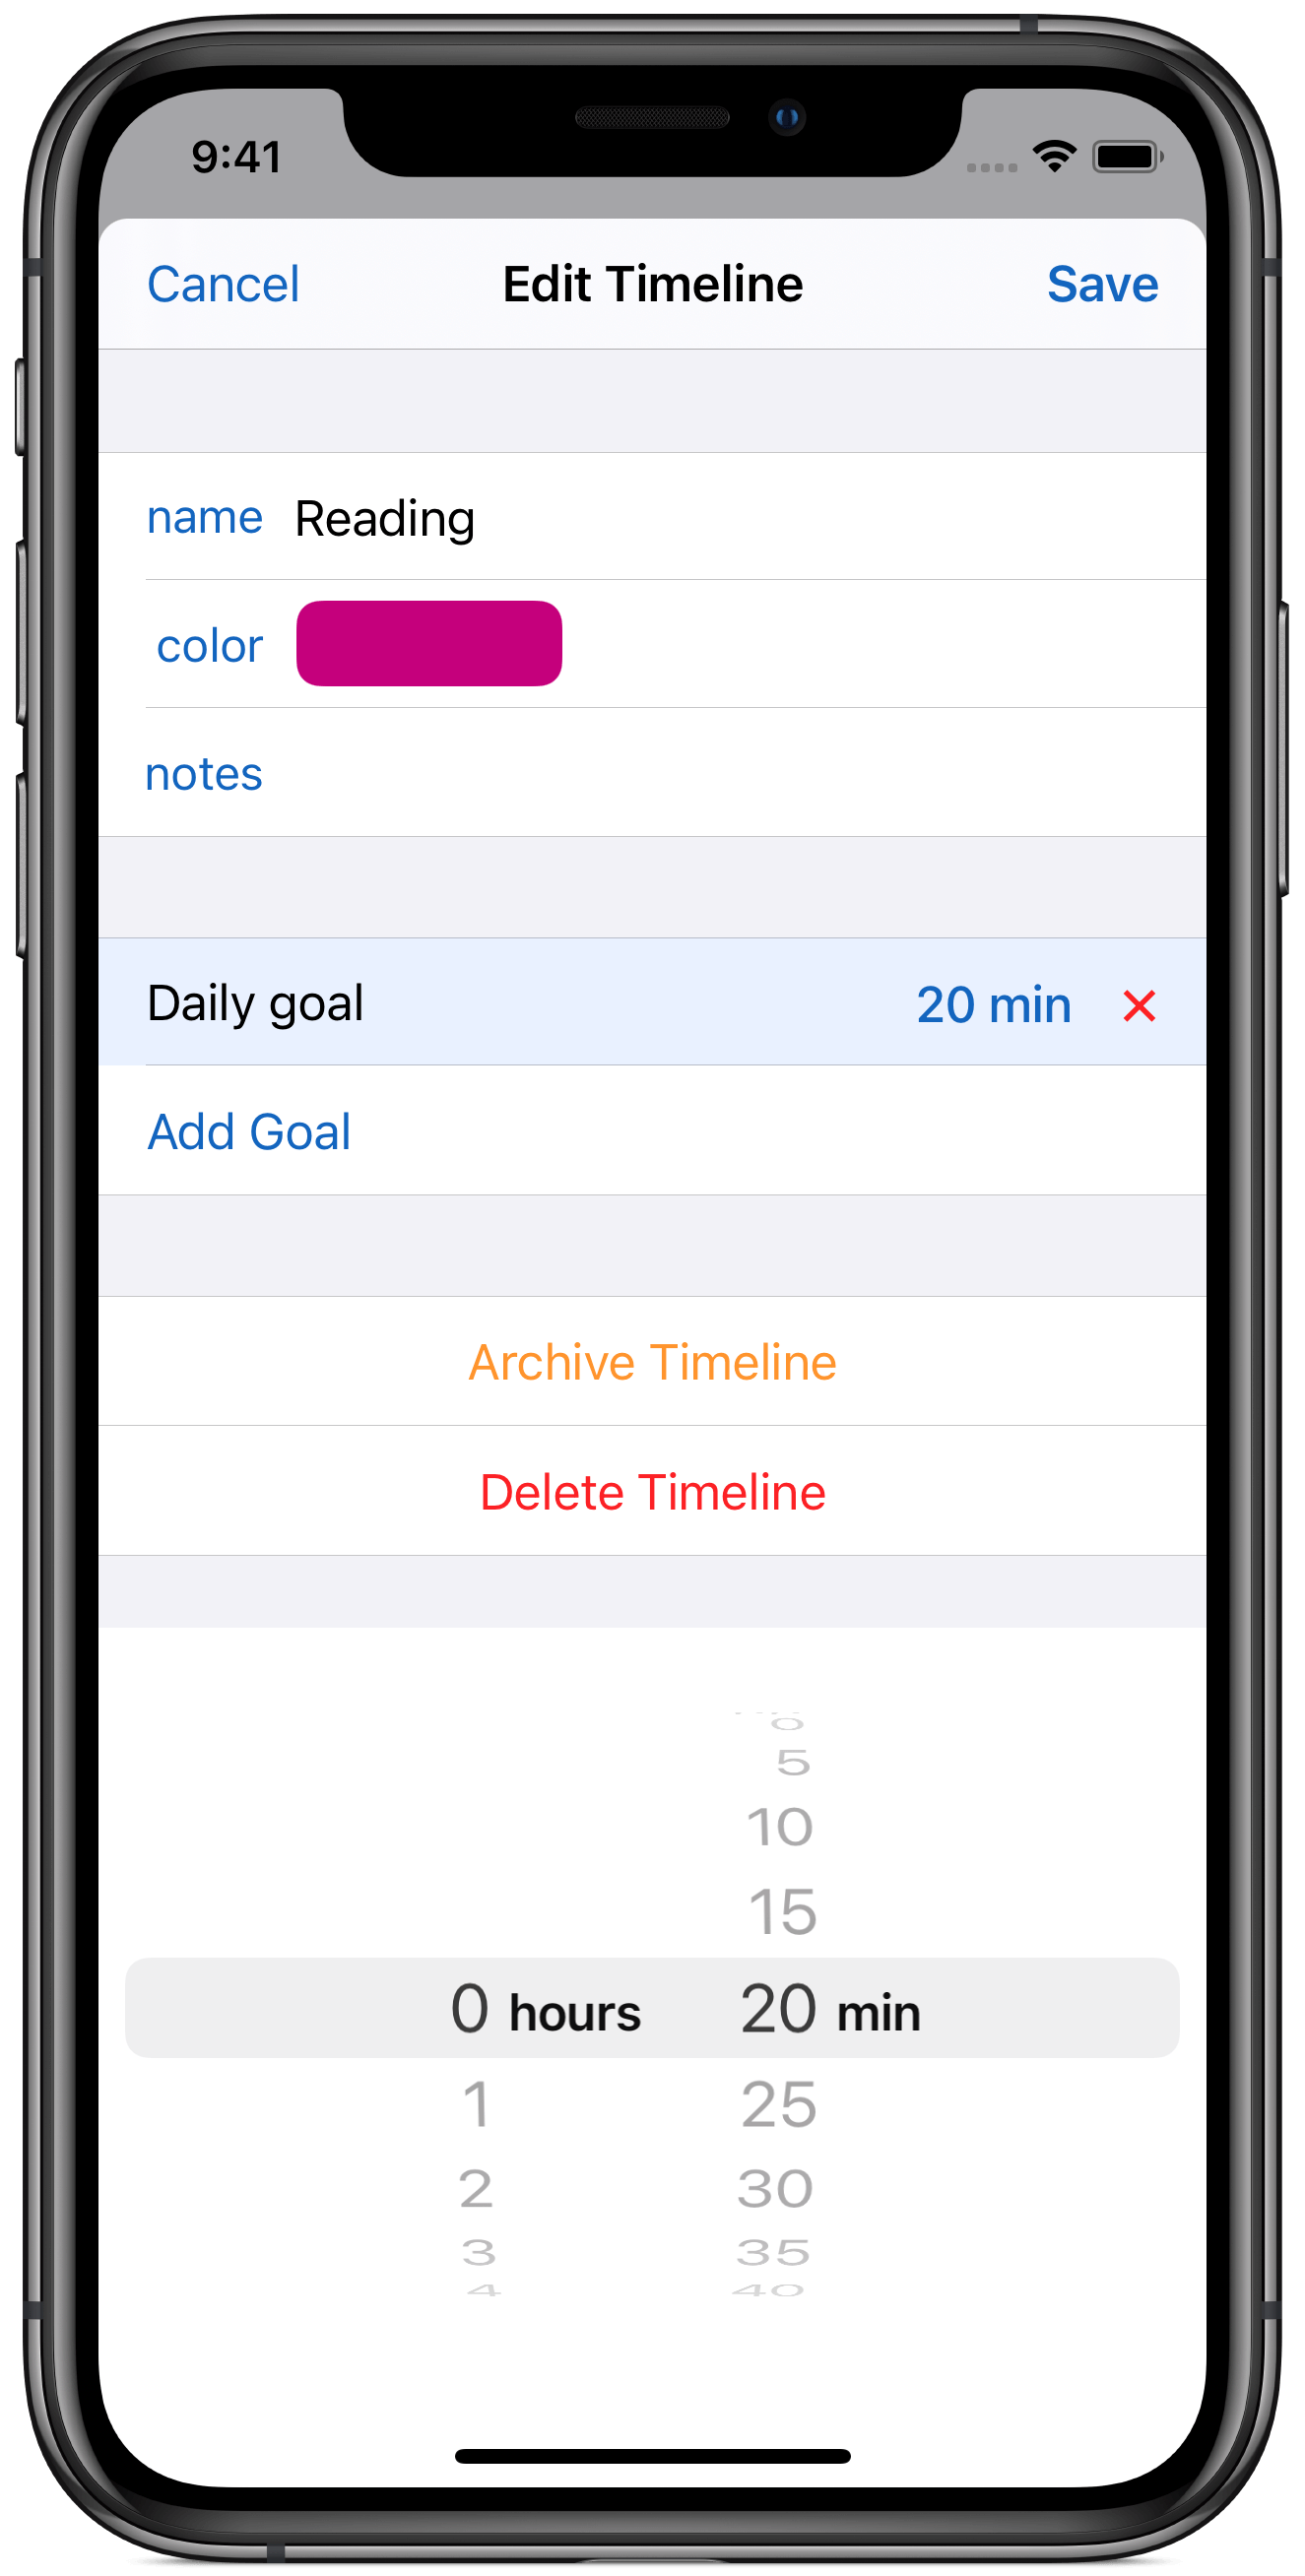
- In the Tracking tab, tap on the Reading timeline, and then tap on Add Goal. Select the Daily goal. Then, use the picker to select 20 minutes and tap save.
- Once you've defined your goals, you can open the Goals tab at any time to see visually your current progress towards your goals.
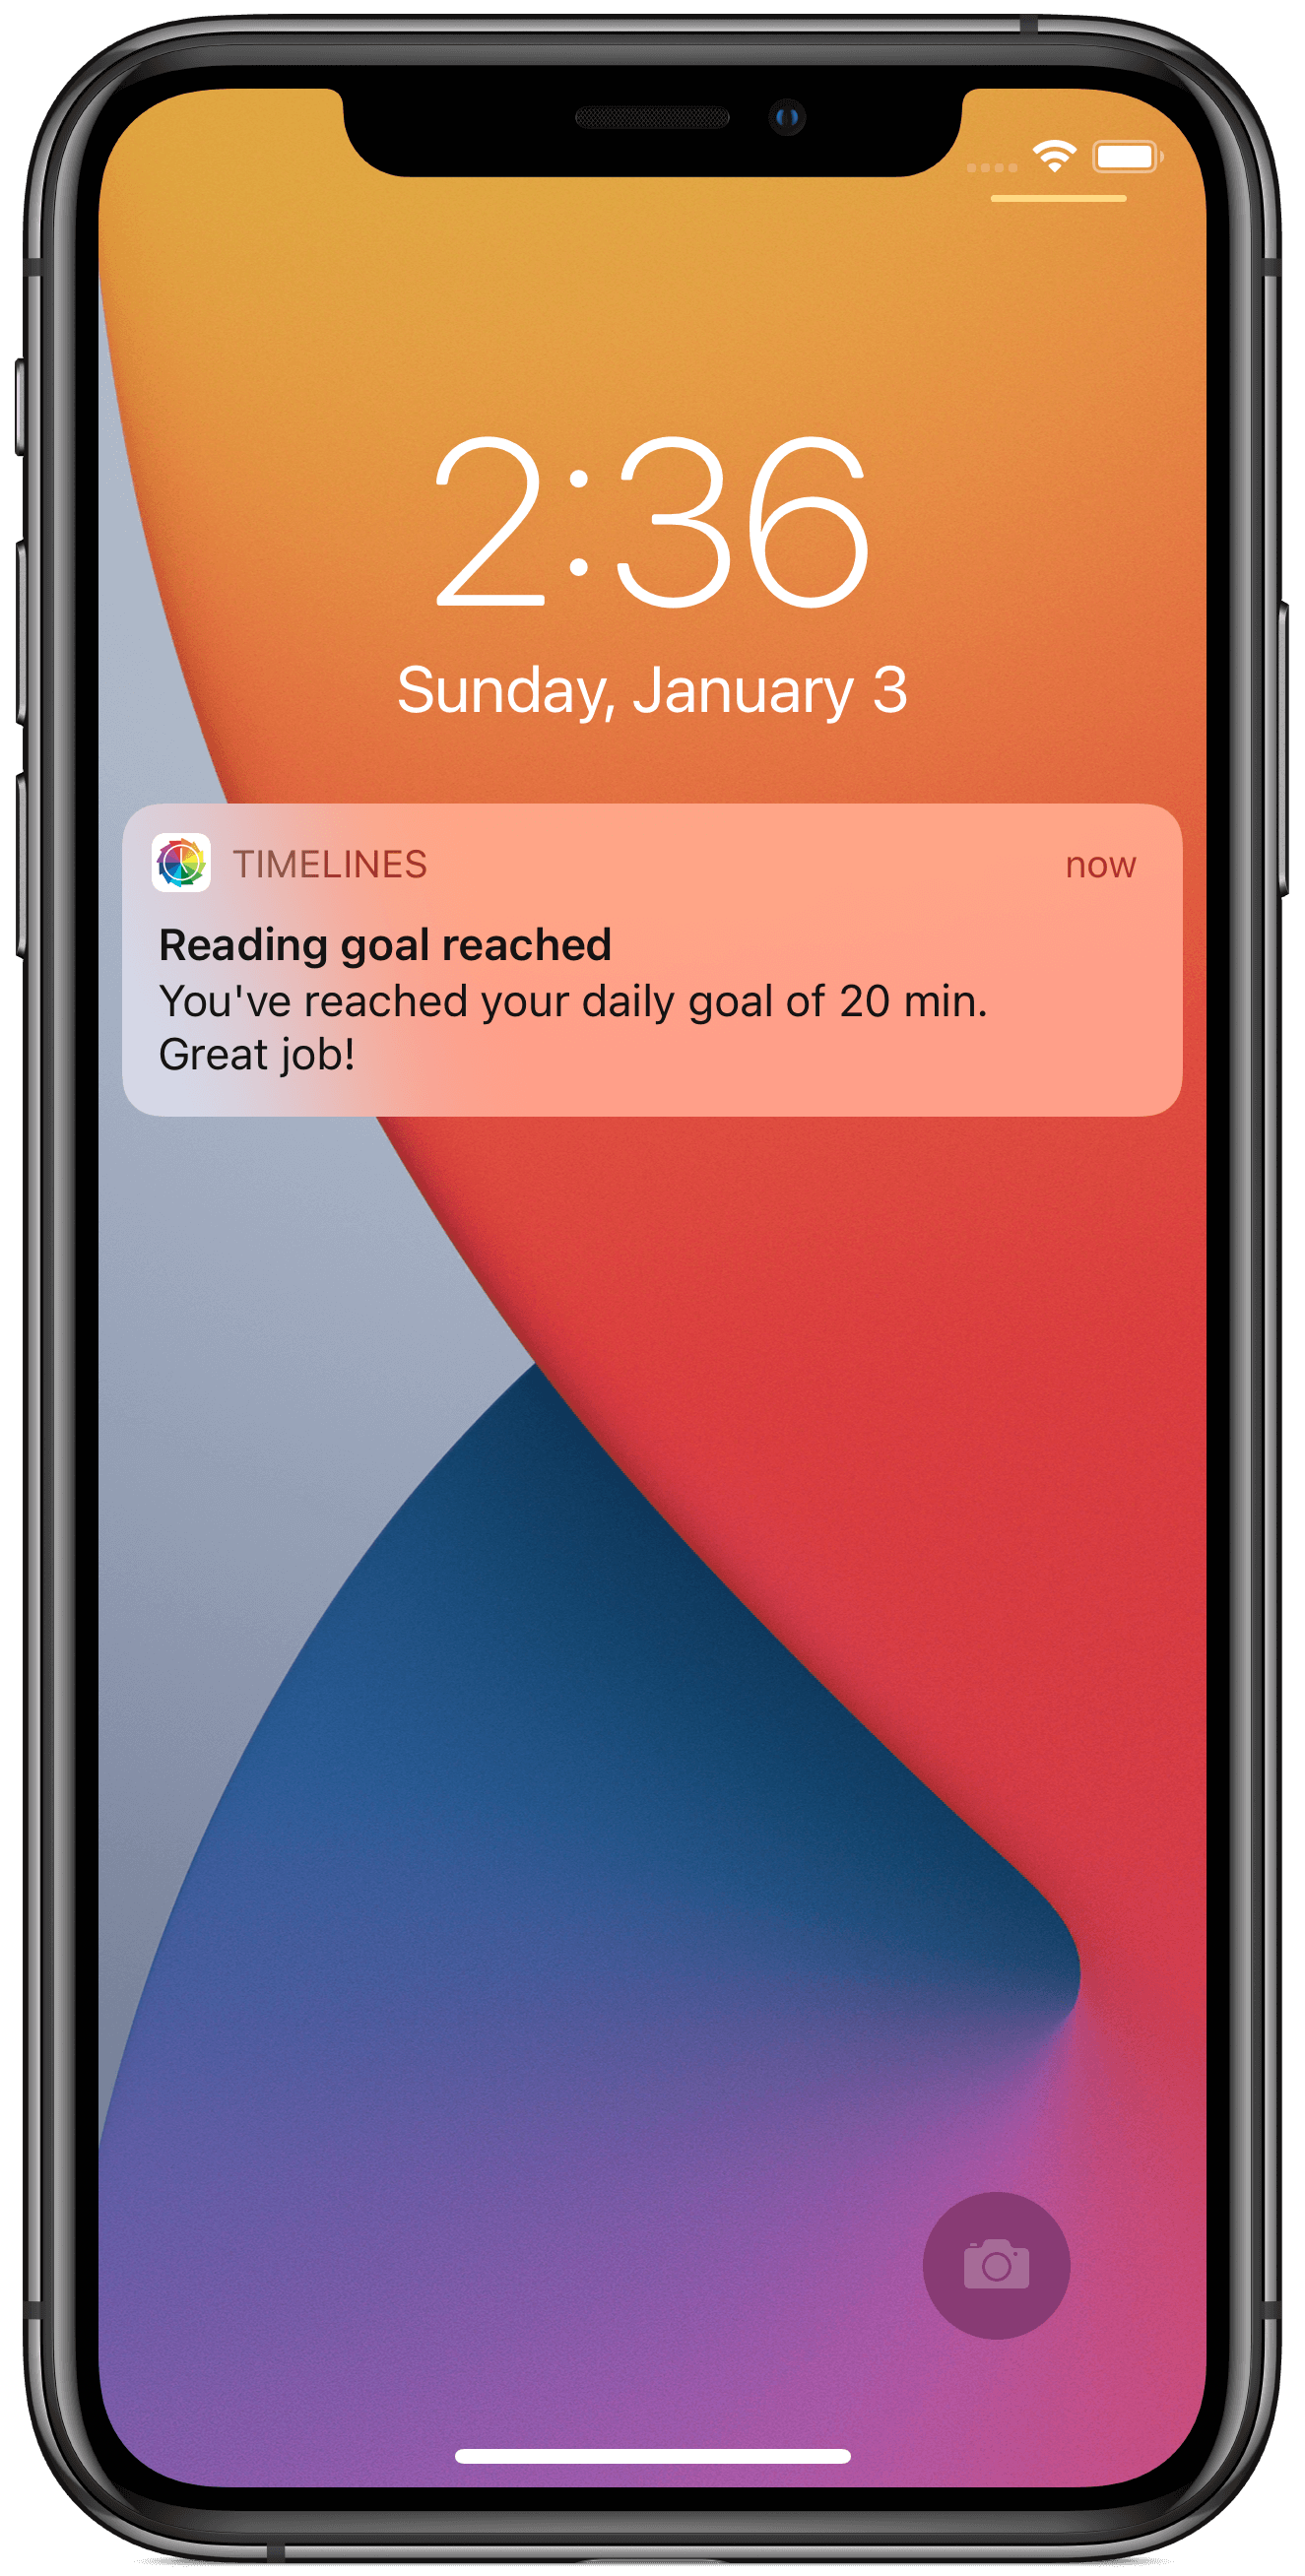
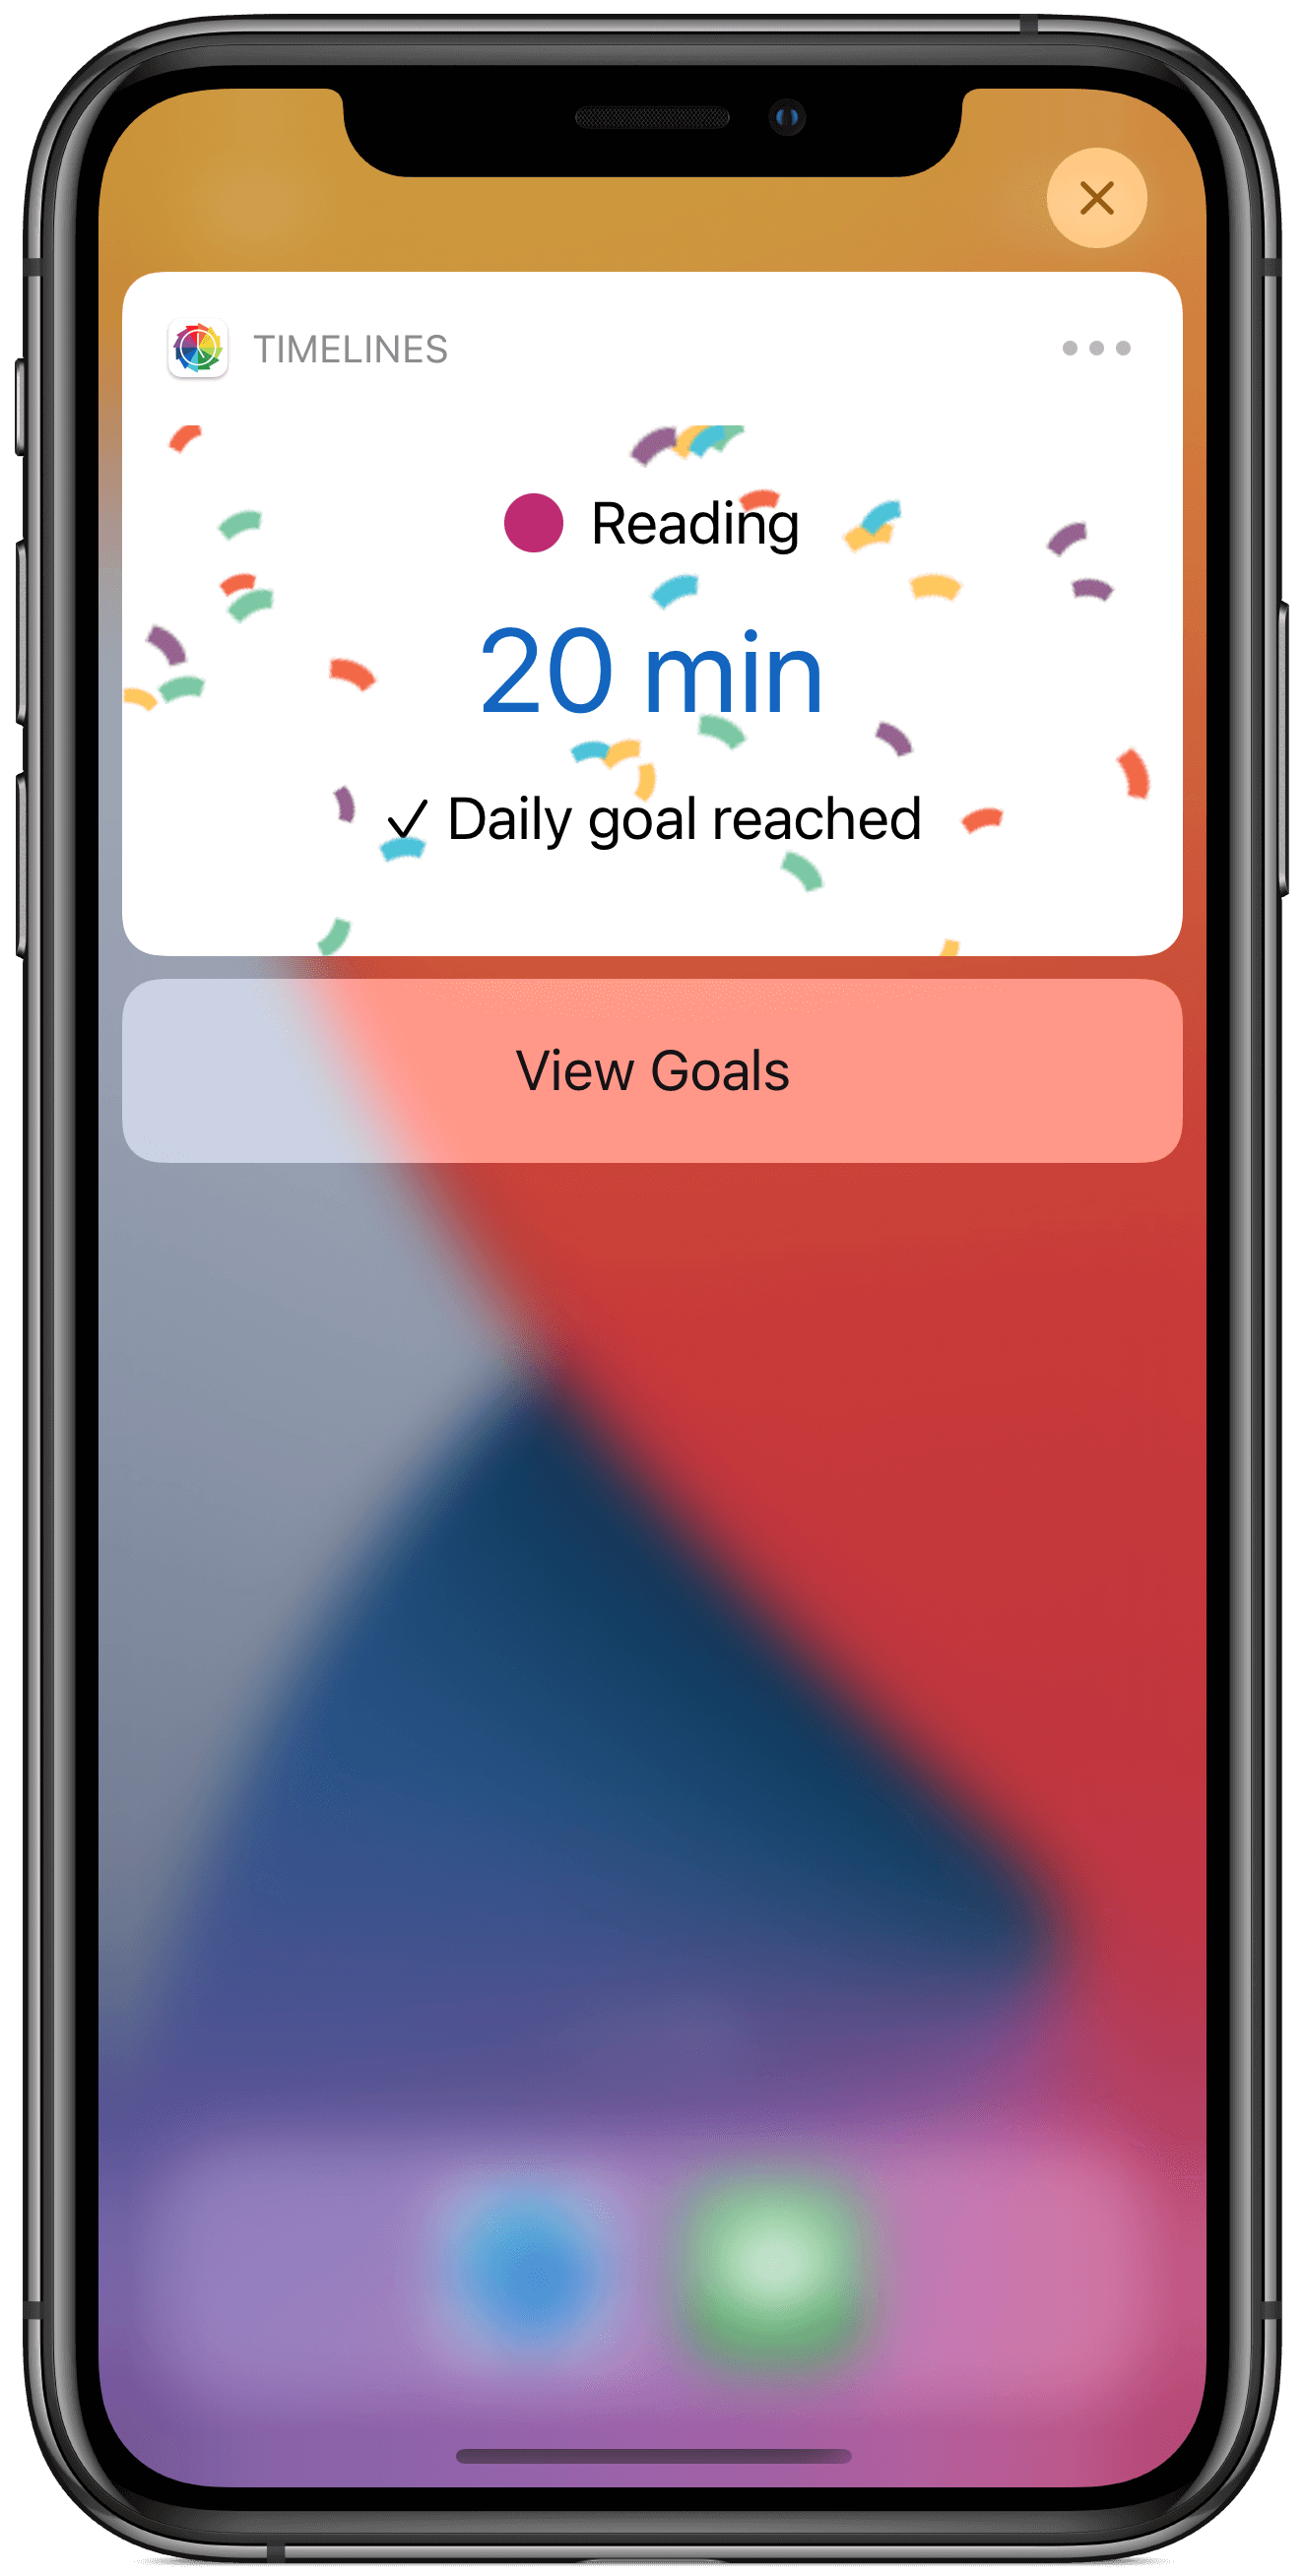
- If you enabled notifications when adding your first goal (or later in Settings), you'll get a notification whenever you reach one of your goals. Long-touch on it to be rewarded with confetti. 🎉
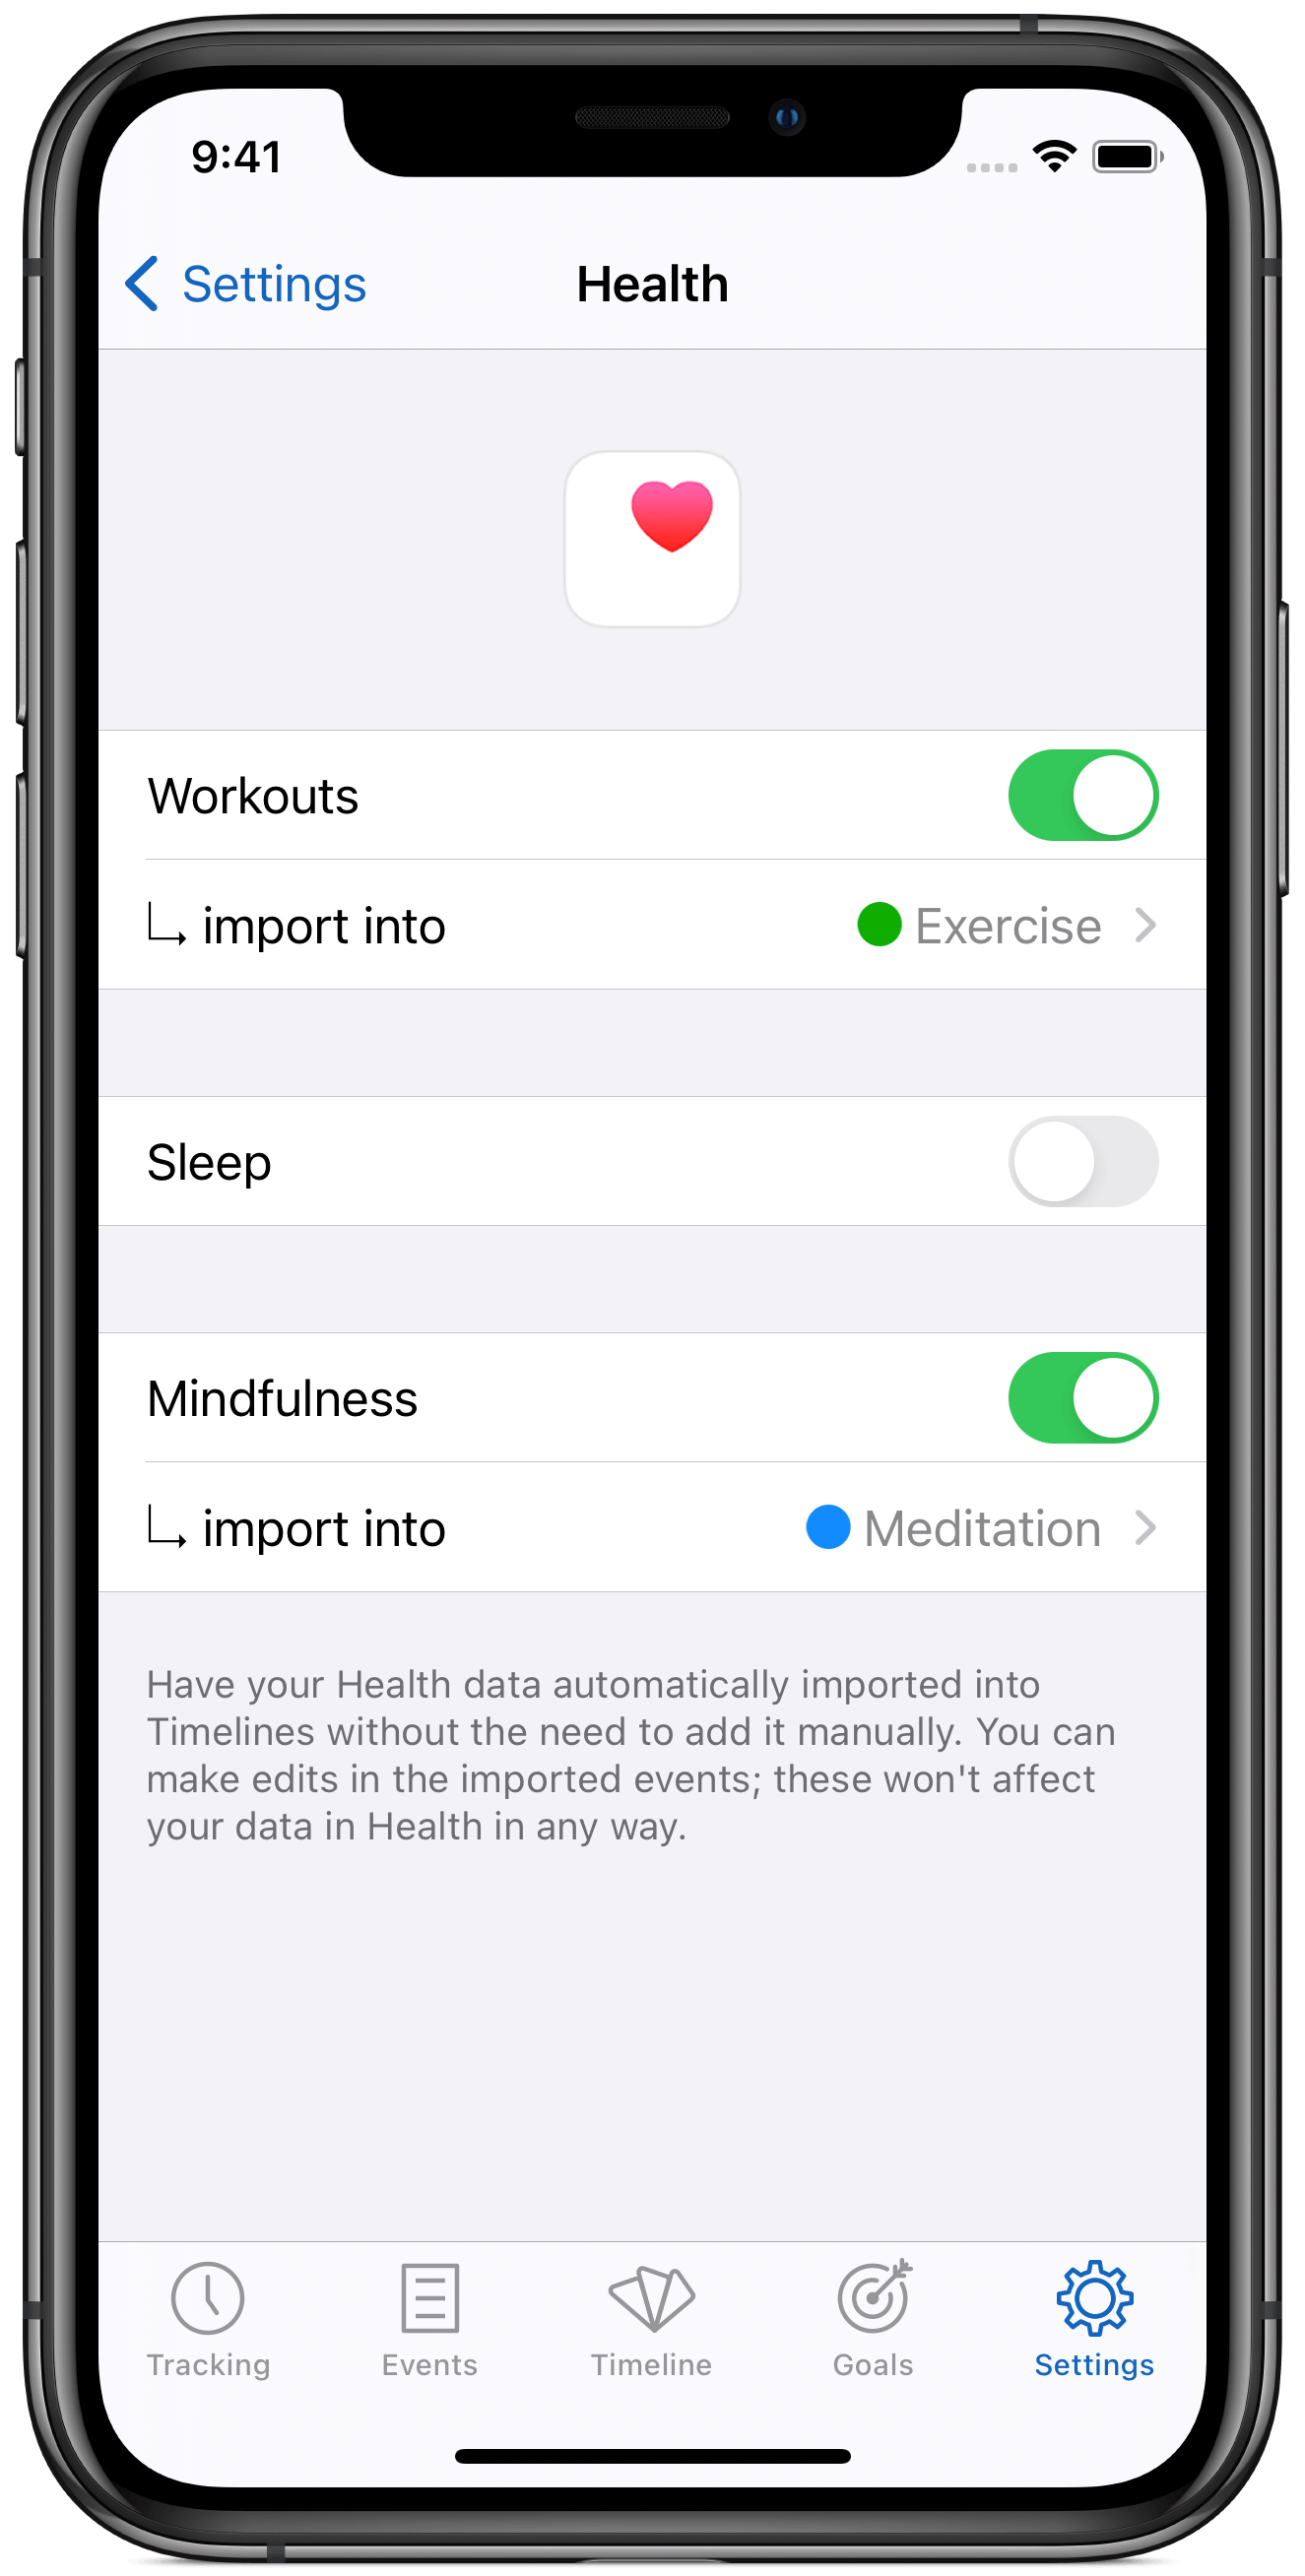
Automatic import from Health
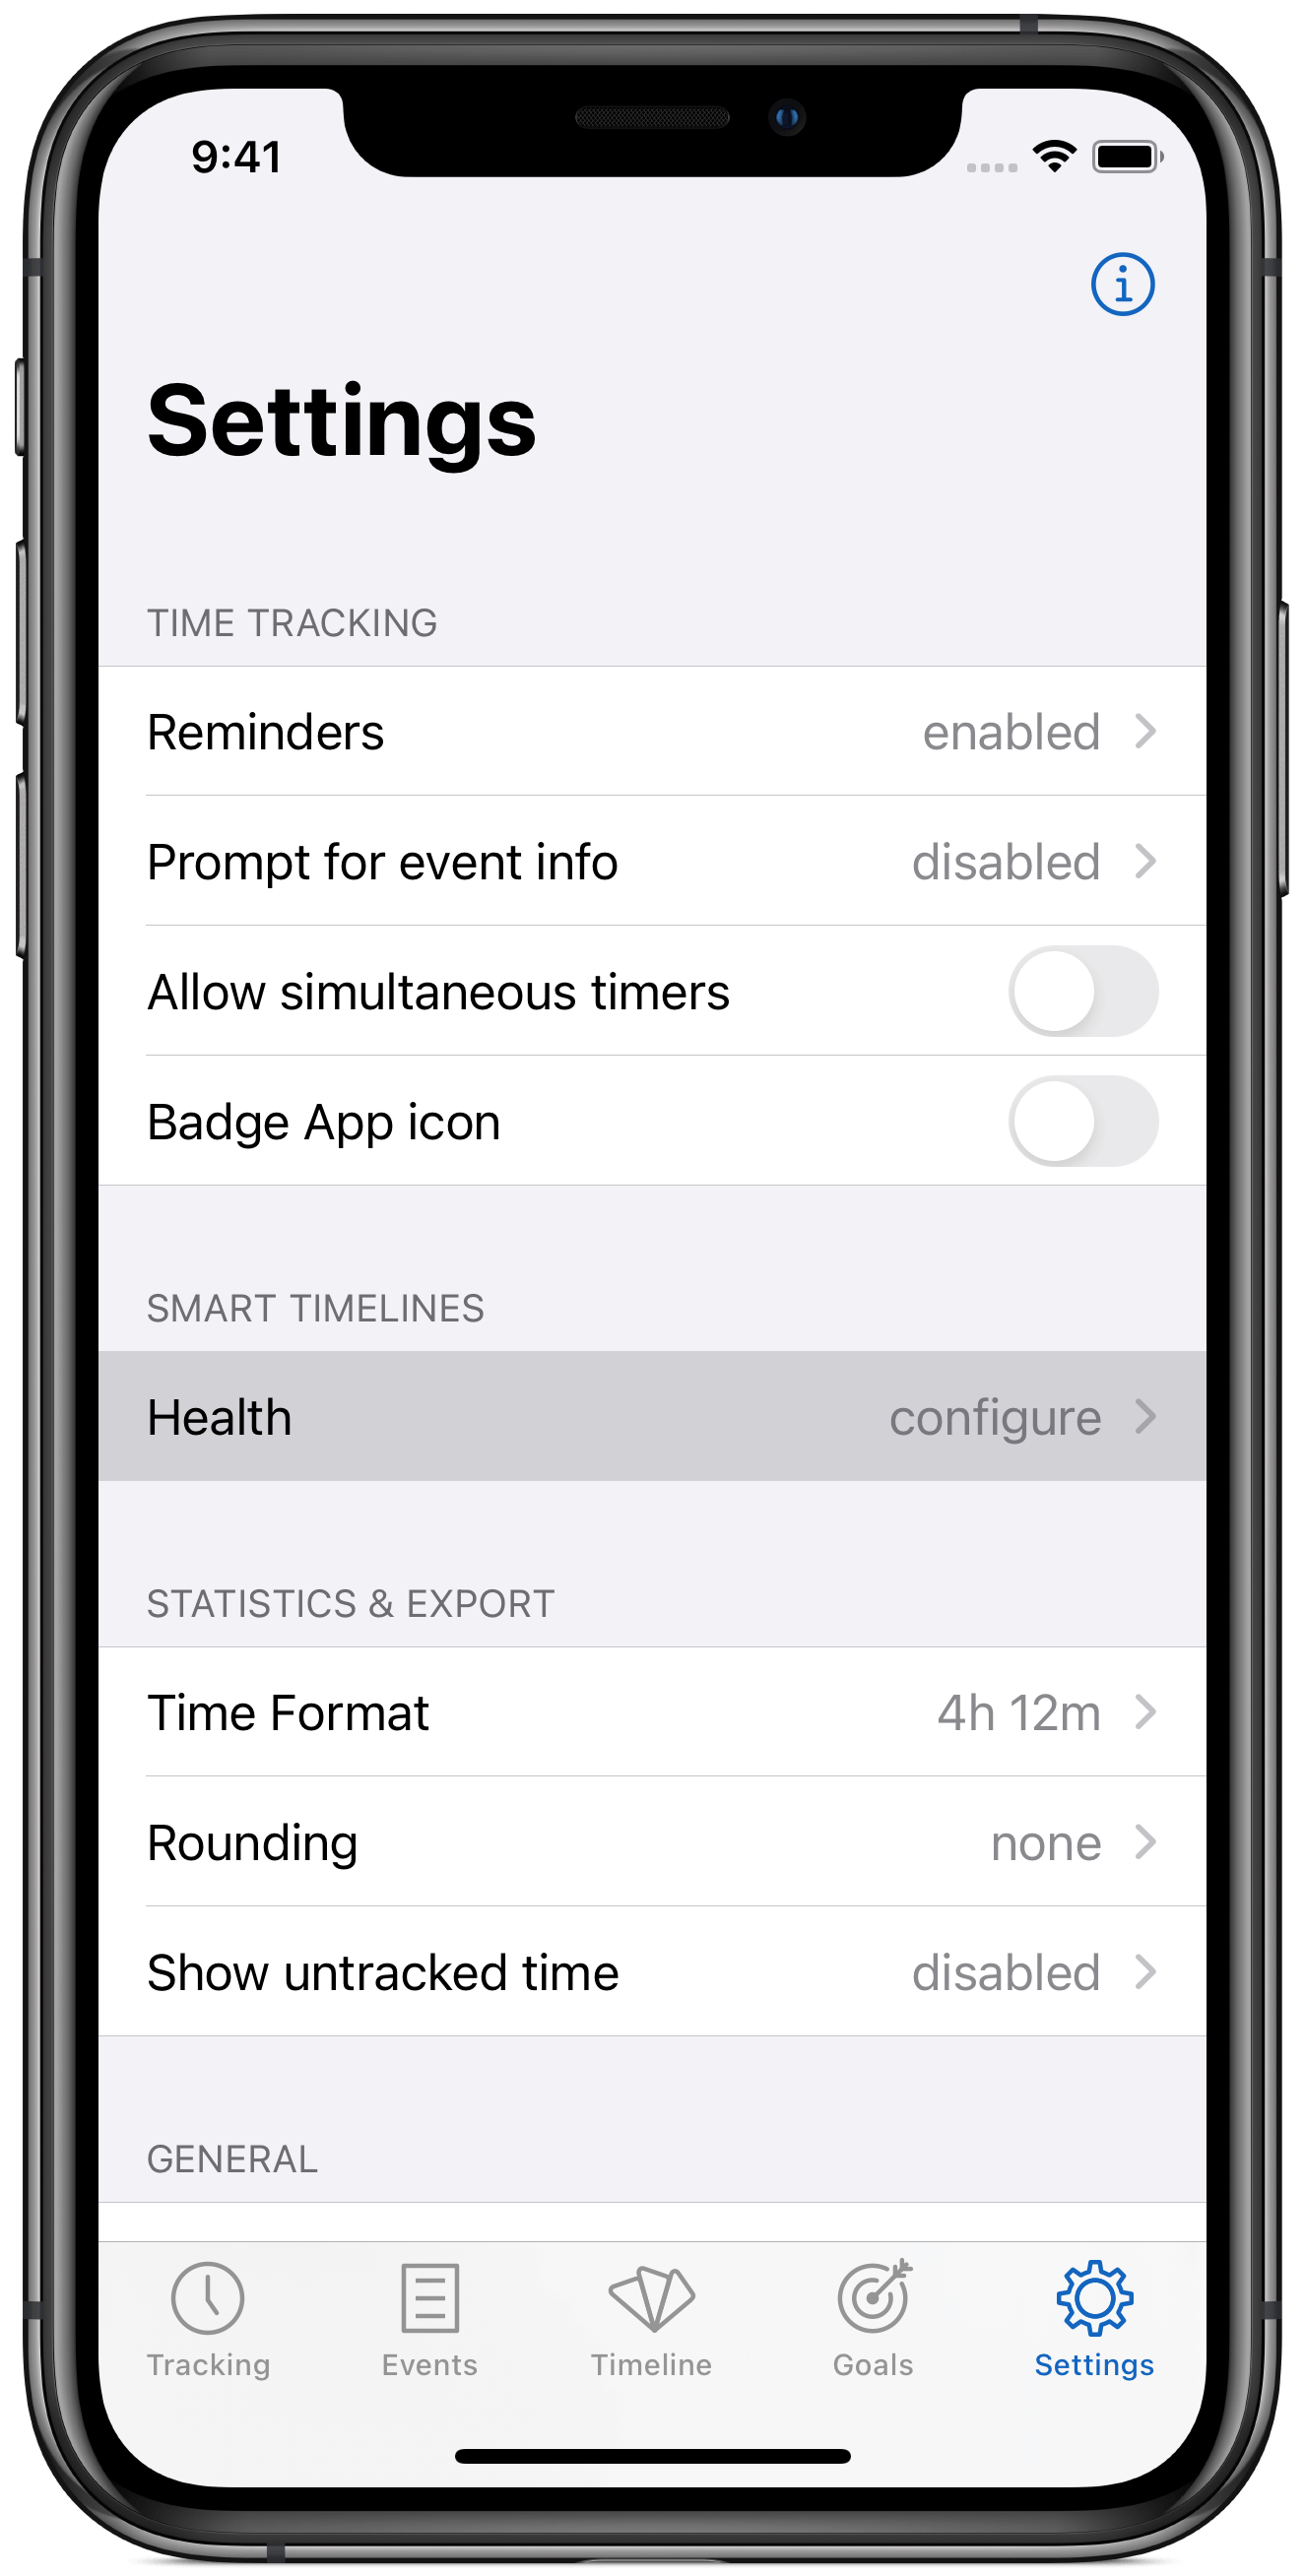
Some data can be tracked automatically thanks to Timelines' integration with Apple Health. If you are using your Apple Watch to track your exercise, that data will be in Health and Timelines can import it from there. The same goes for meditation - that is if you are using an app, such as Calm, that saves data to Health.
- In Settings, tap on Health. Then, enable Workouts and Mindfulness. When prompted where these should be imported, select your existing categories.
Summary
I hope these instructions were understandable. Hopefully, you can see how Timelines can be useful for this kind of tracking. In this article, I focused only on features specific to tracking New Year's resolutions. There is much more that you can do with Timelines.
I wish you the best of luck with your New Year's resolutions. Get Timelines for free now, and lets make 2021 your best year yet! 🚀
![]()